If you’ve been hunting for a cute, beginner-friendly amigurumi project, this Miffy Bunny Crochet Pattern walks you through making an adorable little plush-style bag charm you can clip onto your keys or purse.
Behind the Pattern
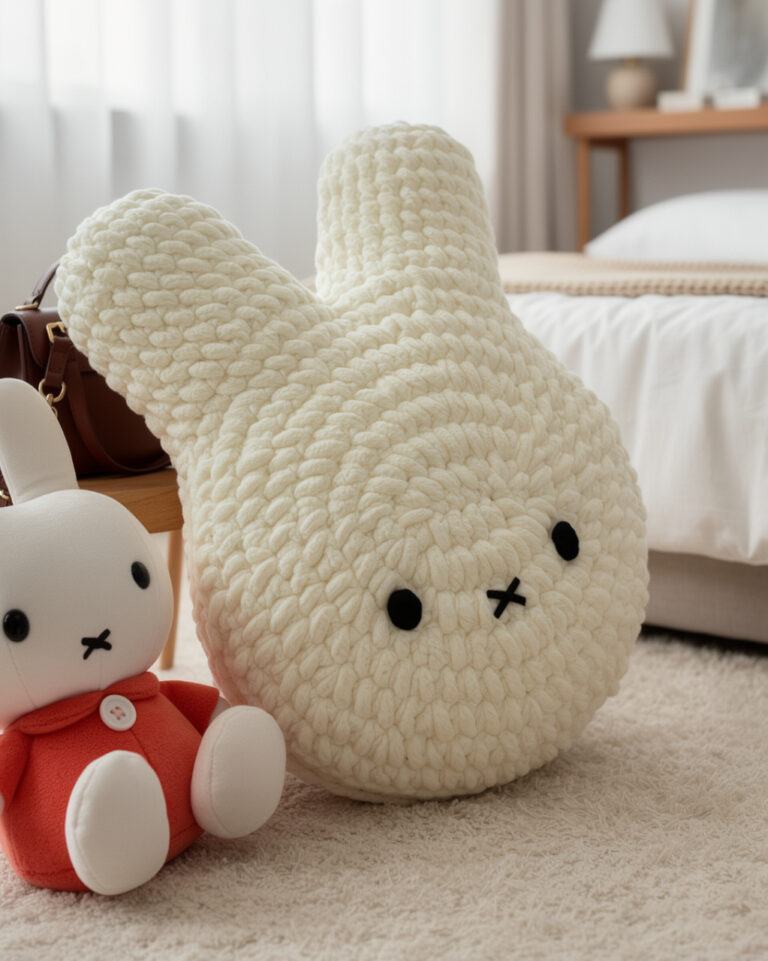
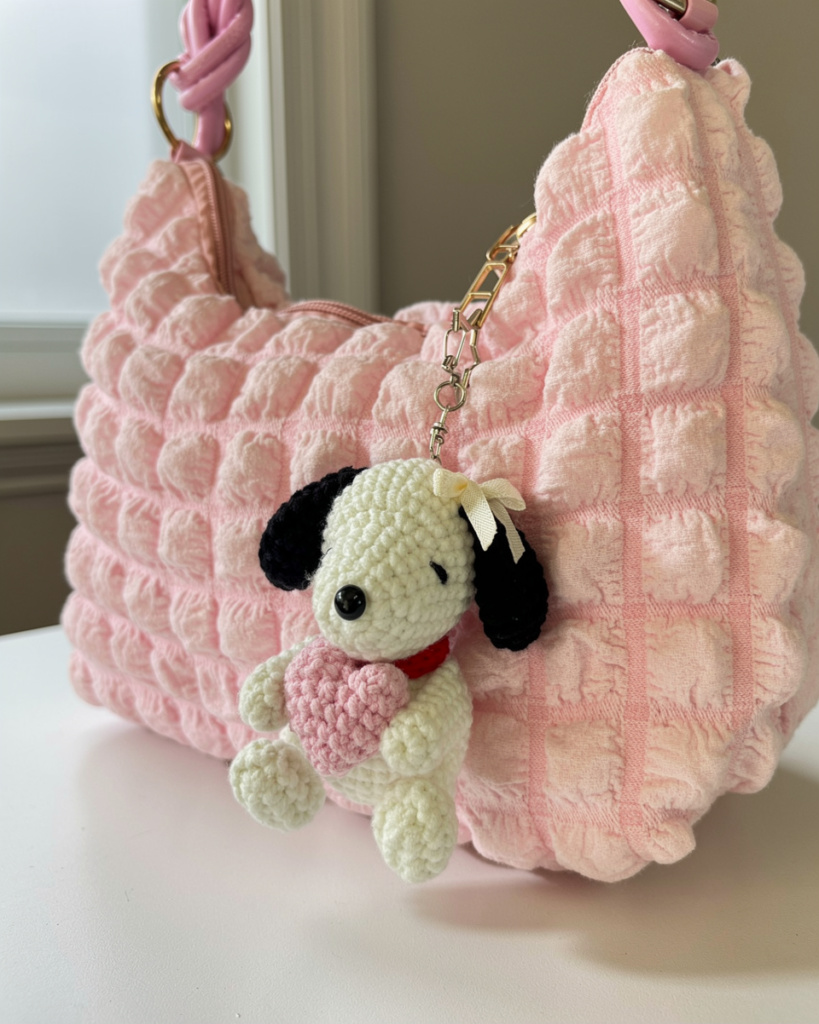
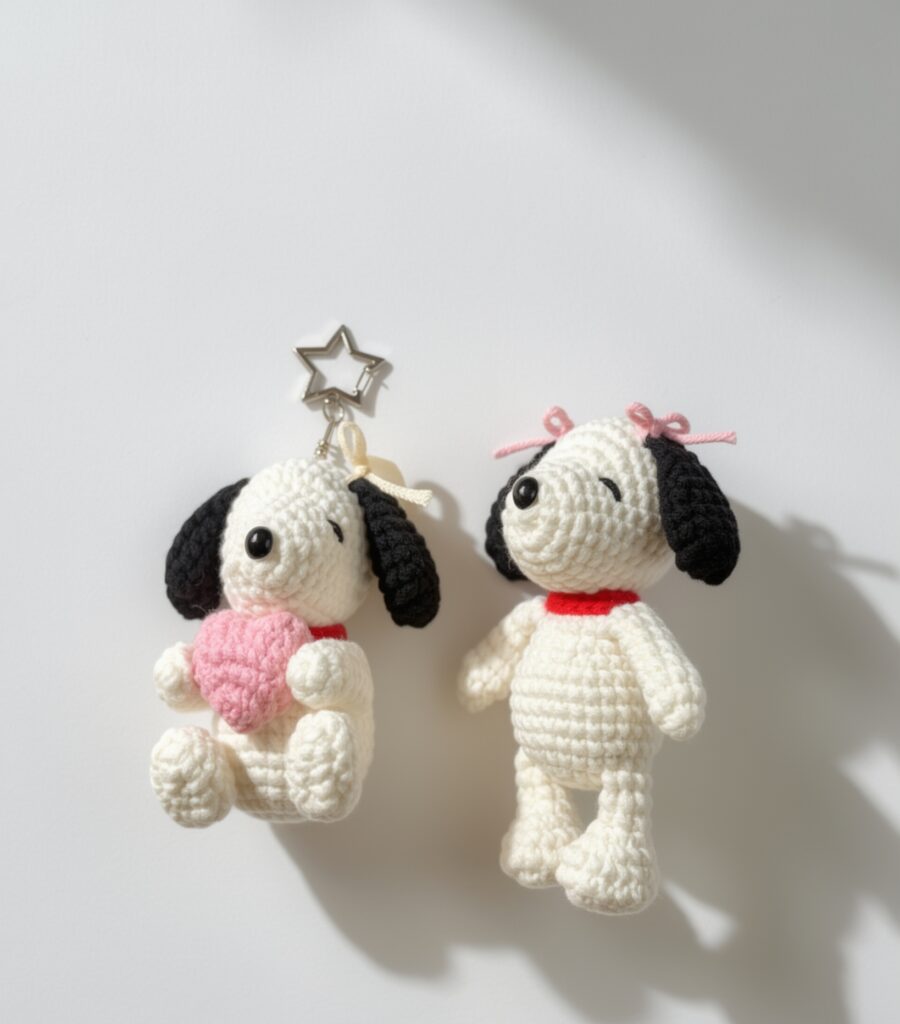
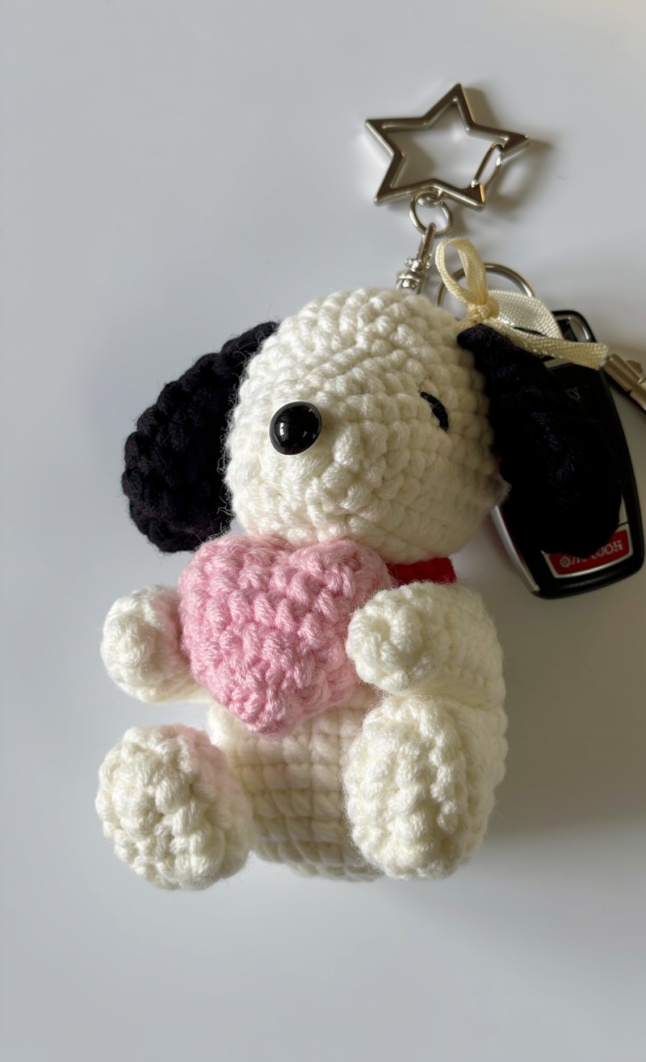
This one is small, sweet, and very “take me everywhere.” The finished piece is a cream-colored little pup charm with a rounded head and body, stubby legs, and two black floppy ears. It’s got a shiny black nose, tiny embroidered eyes, and a red collar, plus a little cream bow by one ear that makes it feel extra put-together.
I also love the tiny pink heart it’s holding against its body. It gives the whole thing a soft, giftable vibe without being over the top. And since it’s a Level 2 easy project, it’s a nice one for when you want something cute on your hook but you don’t feel like wrestling with anything complicated (been there).
Why You’ll Love This Pattern
You’ll finish a cute charm that looks polished without fussy steps.
- Instant personality: The floppy ears, bow, and collar make it feel like a real little character.
- Gift-ready vibe: The pink heart detail makes it an easy “I made this for you” project.
- Fun, quick amigurumi: It’s a small build, so you can actually see progress fast.
Gather Your Supplies
This bunny is mostly one main color, with just a tiny bit of felt for the eyes and a simple ribbon tie.
- 6 Super Bulky chenille yarn: For this project I reach for a super bulky chenille because it builds a plush, squishy bunny fast and hides little imperfections in the shaping. You want something soft with a velvety pile that feels full, not stringy, so the stuffing does not show through. Plan on about 150 g of white for the bunny pieces, plus a short 80 chain length of pink ribbon for the neck.
- 6 mm hook: A 6 mm hook plays nicely with super bulky chenille and gives you a fabric that is thick and cuddly without fighting you every stitch.
- Stuffing material: You do not need a measured amount, just add it in small handfuls and stuff as you go before the openings get tight.
- Black felt for eyes: Cut two small black ovals and glue them on, and you get a clean eye shape without wrestling fuzzy yarn into tiny stitches.
- Glue: Any craft glue that grabs felt well is fine, since you are attaching the eyes instead of sewing them.
- Also needed: scissors, darning needle
Alternative Yarn Suggestions
Chenille is great, but it is not the only way to get a cute bunny. If you want sharper stitch definition or a less fuzzy finish, these swaps work well.
- Super bulky acrylic: Weight 6, often around 80 to 110 yards per ball, and it is a solid pick if you want the same quick build with sturdier stitches and fewer shedding fibers.
- Bulky cotton tube yarn: Weight 5, often around 65 to 110 yards per ball, and it makes a smooth, modern bunny with really clear shaping and a nice heft.
Key Information
Here’s the quick technical snapshot before you start stitching.
| Skill Level | Level 2 — Easy |
| Pattern Gauge | Gauge is not critical for this project. Use a hook size that creates a tight, firm fabric so stuffing does not show through. |
| Finished Size | Approx. 10 in (25 cm) tall (estimated, size varies with yarn and tension) |
| Yarn Weight | 6 Super Bulky |
| Fiber | Chenille (fiber content not specified — check the yarn label) |
| Terminology | US |
Abbreviations & Stitches Used
Keep this list close while you work.
- ch = chain
- MR = magic ring
- sc = single crochet
- inc = increase (2 sc in same st)
- dec = decrease (sc2tog)
- st(s) = stitch(es)
Special Stitches
- MR (magic ring): Form an adjustable loop, work the required number of stitches into the loop, then pull the tail to tighten.
- inc: Work 2 sc in the same stitch.
- dec (sc2tog): Insert hook in next stitch, yarn over and pull up a loop; insert hook in next stitch, yarn over and pull up a loop; yarn over and pull through all loops on hook.
Pattern Notes
This is an amigurumi project worked in continuous rounds unless otherwise stated, so don’t join rounds unless the pattern tells you to. Continue directly to body without cutting yarn. You’ll be crocheting separate parts and then moving straight on where noted, so keep an eye on your round marker and stitch counts. Start stuffing as indicated, not all at once. Leave arms and legs unstuffed as indicated so they stay floppy and easy to attach.
How to Make the Miffy Bunny Crochet Pattern
Work each piece as written, then assemble at the end for a clean, sturdy finish.
Ears (Make 2)
Make 2. Cut yarn after first ear. Do not cut after second ear. ch 1, then skip to third stitch (counting back) of first ear to begin the head. You’re building both ears first so you can join them and flow straight into the head without extra sewing.
Round 1: 7 sc in MR. [7] Keep the magic ring tail accessible. You’ll want to cinch it tight before Round 2 so the center doesn’t loosen later.
Round 2: 7 sc. [7]
Round 3: 7 sc. [7]
Round 4: 7 sc. [7]
Round 5: 7 sc. [7]
Round 6: 7 sc. [7]
Fasten off after first ear only. After second ear, do not fasten off; ch 1 and join to first ear as directed to begin the head.
Head
Worked in continuous rounds. Continue directly to body without cutting yarn. This section starts by joining the ears, so take a second to confirm you’re at the correct stitch on the first ear before you commit to the join.
Round 1: 7 sc on first ear, 1 sc in ch-1, 7 sc on second ear, 1 sc in connecting ch. [16] When you work into the ch-1 spaces, aim under both loops of the chain for a more secure bridge.
Round 2: (1 sc, inc) x 8. [24] Keep an eye on where your round begins. With continuous rounds, it’s easy for the start point to drift if you don’t mark it.
Round 3: 24 sc. [24]
Round 4: (5 sc, inc) x 4. [28]
Round 5: 28 sc. [28]
Round 6: 28 sc. [28]
Round 7: (5 sc, dec) x 4. [24] If you use invisible decreases, stay consistent here. Mixing decrease styles can change your tension in a way you’ll notice when stuffing.
Round 8: (2 sc, dec) x 6. [18]
Start stuffing.
Round 9: (1 sc, dec) x 6. [12] Add stuffing in small pinches and push it into place as you go. Don’t wait until the opening gets tiny.
Do not fasten off; continue directly to body.
Body
Worked in continuous rounds. You’ll keep going from the head, so there’s no break in the fabric and no seam line to manage.
Round 10: (1 sc, inc) x 6. [18] This is also a useful round to note for later, since the arms get attached at Round 10 of body during assembly.
Round 11: (1 sc, inc, 1 sc) x 6. [24]
Round 12: (3 sc, inc) x 6. [30]
Round 13: 30 sc. [30]
Round 14: 30 sc. [30]
Round 15: 30 sc. [30]
Round 16: 30 sc. [30]
Round 17: (3 sc, dec) x 6. [24] Take your time on the decreases. Tight, even tension here helps the stuffing stay put.
Round 18: (2 sc, dec) x 6. [18]
Stuff firmly.
Round 19: (1 sc, dec) x 6. [12] If you’re adding a little more stuffing, push it outward toward the sides before you reduce again.
Round 20: 6 dec. [6] You may need to work these last decreases a bit snug. That’s normal.
Close and weave in end.
Arms (Make 2)
Make 2. Leave unstuffed. These are simple tubes, and you’ll flatten and close them at the end so they’re ready to stitch onto the body.
Round 1: 7 sc in MR. [7]
Round 2: 7 sc. [7]
Round 3: 7 sc. [7]
Round 4: 7 sc. [7]
Round 5: 7 sc. [7]
Round 6: 7 sc. [7]
Flatten and close with 2 sc through both layers. Fasten off, weave in ends.
Legs (Make 2)
Make 2. Leave unstuffed. You’ll sew these on later, so you’re leaving a long tail on purpose. Don’t trim it short and then regret it.
Round 1: 6 sc in MR. [6]
Round 2: 6 inc. [12]
Round 3: 12 sc. [12]
Round 4: 12 sc. [12]
Cut yarn, leaving a long tail for sewing.
Ribbon
Use pink cotton yarn. Tie a 80-ch ribbon around the neck for a sweet finishing touch. If you want cleaner ends, you can knot first, then adjust the bow after it’s sitting where you like.
Fasten off, weave in ends.
Finishing
Attach arms at Round 10 of body, positioned horizontally. Pin them in place first so both sides match, then stitch through the arm and the body stitches with small, even whip stitches.
Sew legs at Rounds 15–17. Use the long tail you left, and take a few extra passes at the top edge of each leg since that’s where they’ll get tugged.
Cut two small ovals from black felt for eyes and glue securely. Let the glue cure fully before you handle the toy much, and keep the felt pieces away from the stuffing opening so you’re not pressing on a soft spot.
Tie a 80-ch ribbon around the neck for a sweet finishing touch. Adjust the knot so it sits where you want, then trim ends only after you’re sure.
Baby & Child Safety Notes
Felt eyes and glued parts can come loose with rough play, so don’t give this to a baby or toddler unless you switch to embroidered eyes and skip anything that could be pulled off. Weave in every yarn end firmly, and if you’re gifting it, give the arms, legs, and ribbon a good tug test before it leaves your hands.
Frequently Asked Questions
Mine comes out around 10 in (25 cm) tall. If you crochet tighter or looser, or swap yarn thickness, the height shifts a bit, so don’t treat that number like a law.
I use 6 super bulky yarn here because it gives that chunky, plush amigurumi look fast. If you use a different yarn weight, you’ll get a different size bunny, and you’ll need to adjust your hook to match, by any means.
Use a 6 mm hook if you want the same general size and feel I get. If your stitches look gappy, drop down a hook size until the fabric looks tighter.
I’d call it Level 2 Easy. If you’ve already made one small amigurumi and you’re comfortable keeping track of your rounds, you’re in the right spot.
Nothing, most of the time. Tension changes the height a lot with super bulky yarn, and even the same hook can look different in different hands, so there’s that.
Final Thoughts
That’s it for my Miffy Bunny Crochet Pattern. I love how quickly this little amigurumi works up with super bulky yarn and a 6 mm hook, and it still ends up with that simple, clean bunny shape I’m after. If you make one, tell me what height yours landed at and what yarn you used, because everybody’s tension has opinions. Save it to Pinterest if you’re not starting today, and if you share photos online, tag me so I can see your bunny lineup.