If you’ve been hunting for a cute, practical little make, this Halloween Cat Crochet Pattern walks you through a small cat-themed pouch with a fold-over flap and a bow-tie style tie. It’s the kind of accessory that feels right for Halloween season when you want something fun but still actually useful.
The Inspiration
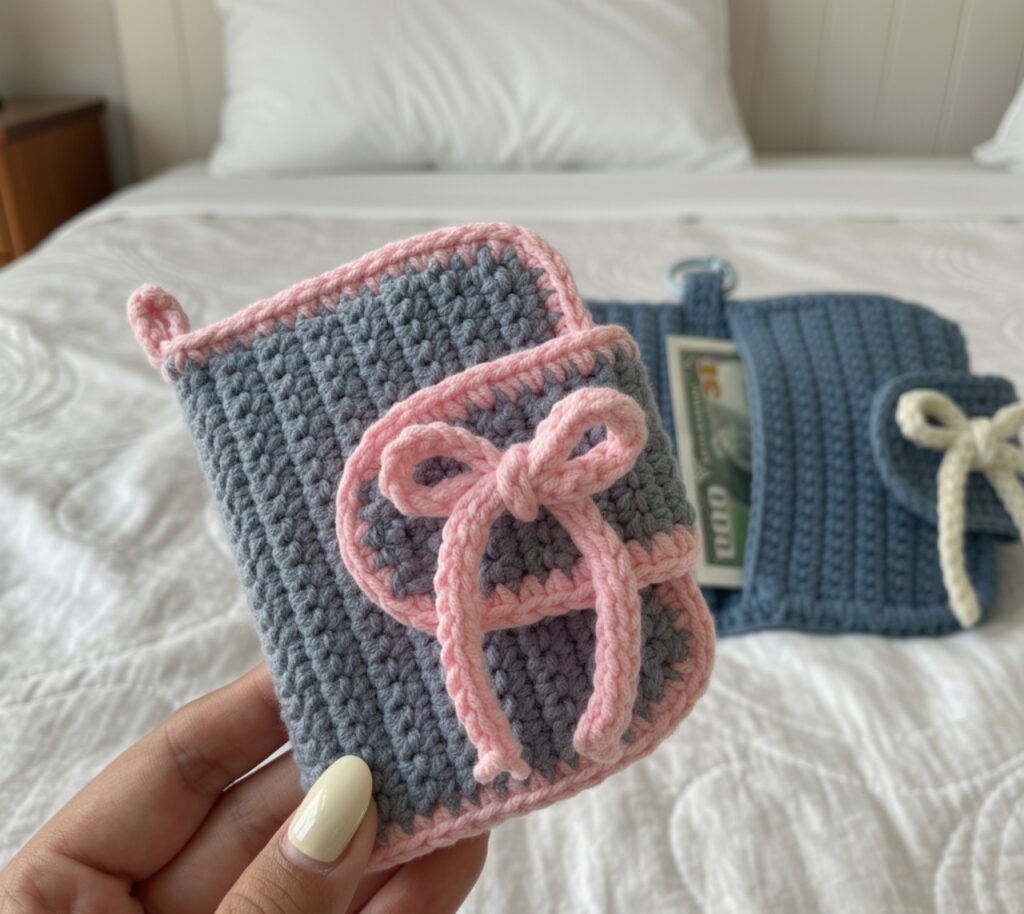
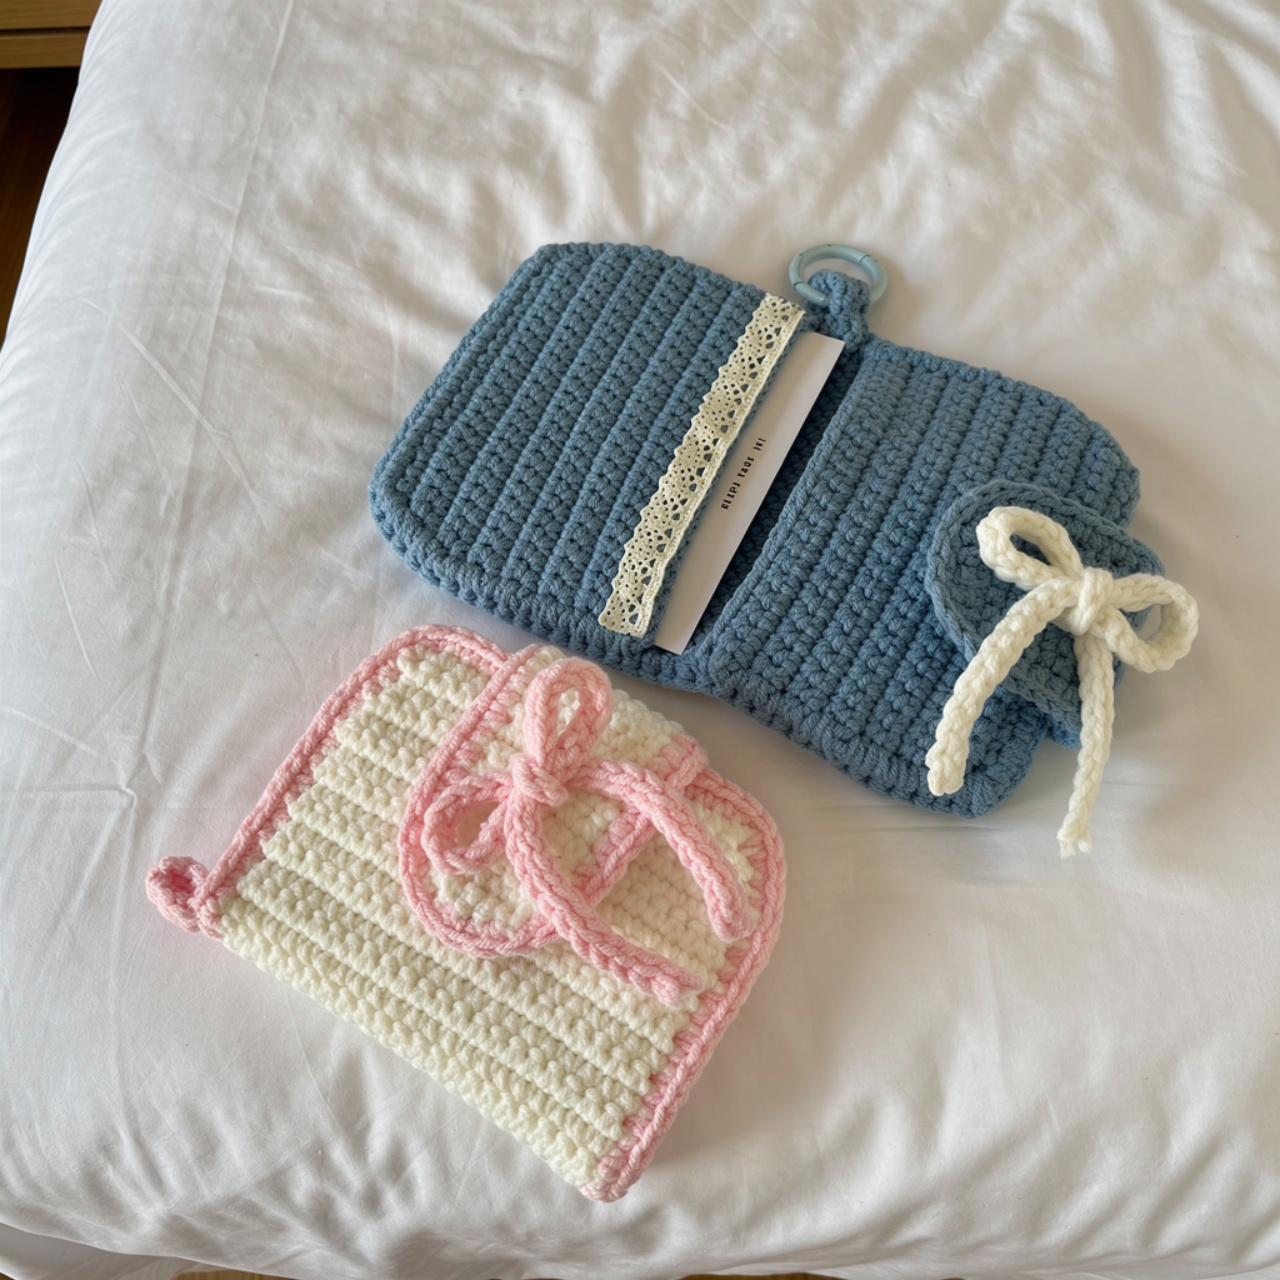
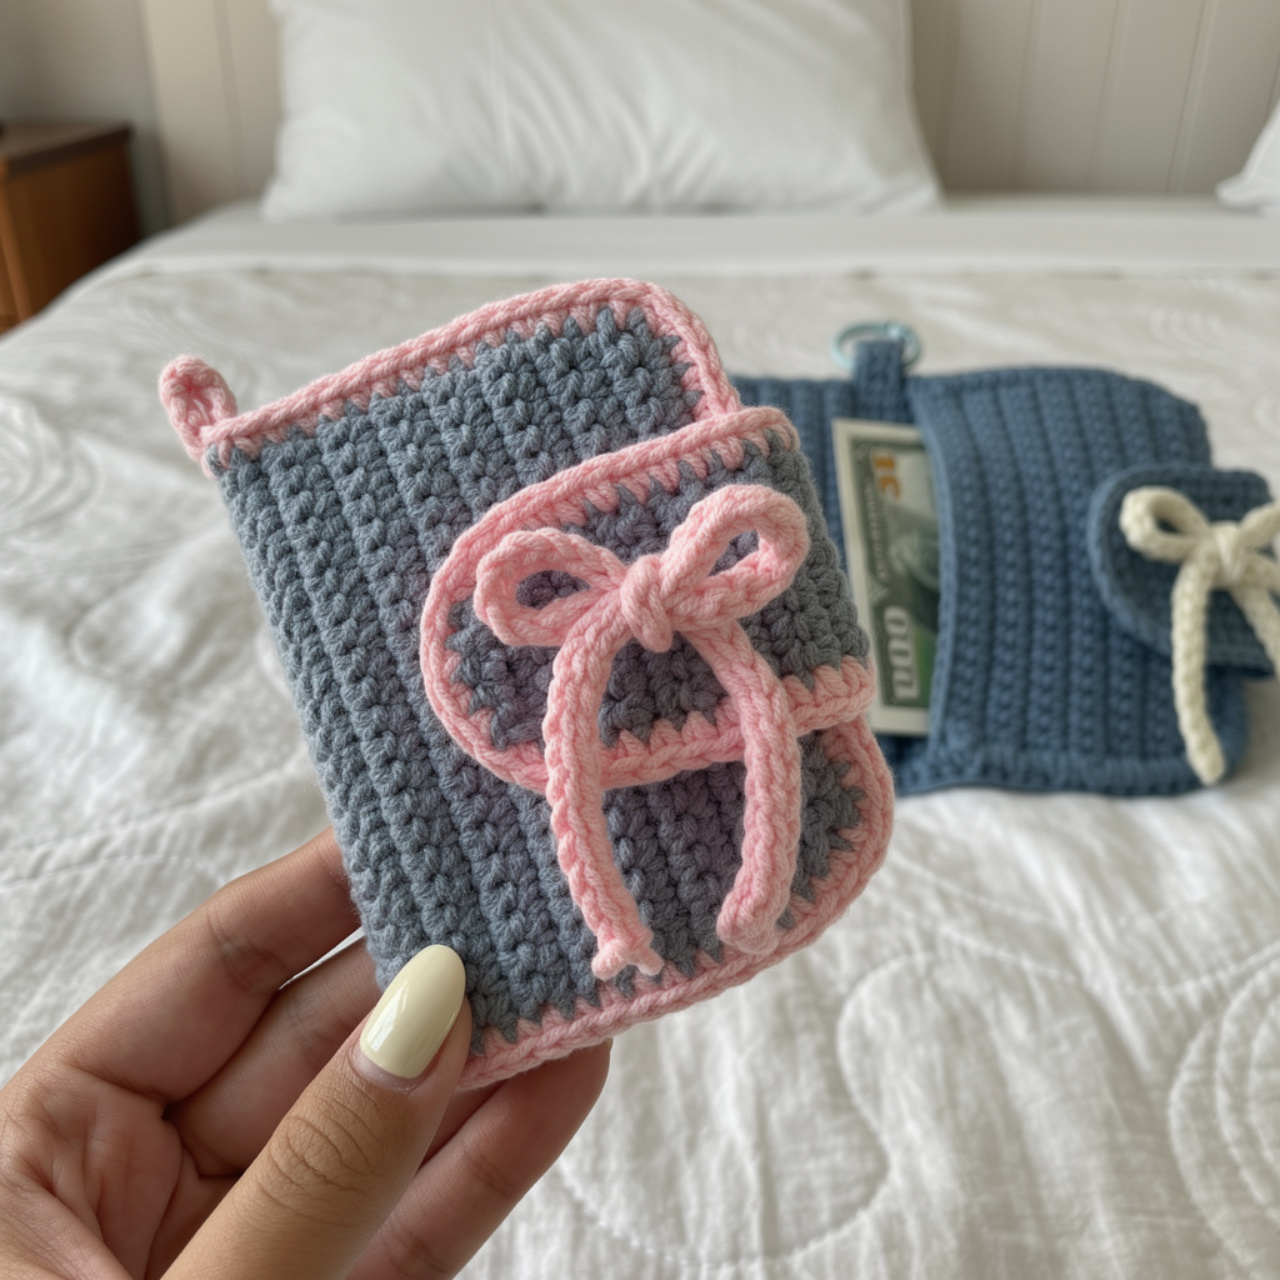
I wanted this to feel like a sturdy little wallet pouch, not fussy, not floppy, just a solid rectangle you can toss in a bag and not worry about. The sample is worked in gray with a pink border that frames the edges, and that color combo ended up being way cuter than I expected (pink and gray always gets me, I think). The texture is chunky and tightly stitched, so it reads more “cozy” than “dainty,” and that’s exactly the vibe I was after.
The fold-over flap gives it that classic pouch shape, and the front tie is this sweet pink bow that adds just enough personality without going overboard. It’s a Level 2 easy project, so you get the satisfying finished look without having to babysit a complicated design the whole time. Simple shape, bold little details, done.
Why You’ll Love This Pattern
You’ll finish with a sturdy pouch that’s cute enough to show off.
- Quick accessory win: It’s a small project, so you get a finished piece without a long haul.
- Clean shape, fun details: The flap and pink edging make it look polished, not plain.
- That bow tie moment: The front tie adds a playful pop and keeps the flap closed.
Materials You’ll Need
This one is mostly about getting a neat, sturdy fabric, and the optional larger hook helps if you want a softer finish.
- 2 Fine / Sport milk cotton (cotton blend) yarn: For this project I reach for a sport weight cotton blend because it holds its shape without feeling stiff. Milk cotton has a smooth, slightly springy feel, so your stitches look tidy and the edges behave when you add the flap and edging. Plan on about 100 g total for the whole piece (body panel, pockets, flap, edging, keyring loop, ribbon).
- 3 mm crochet hook; 4 mm crochet hook (optional): The 3 mm hook gives you a firm fabric that looks clean, and the 4 mm is there if you want a little more drape or you crochet tight.
- Keyring (implied by keyring loop): Use whatever size ring you like, just make sure your loop fits snugly around it so it doesn’t twist around later.
- Also needed: stitch markers, darning needle, scissors
Yarn Substitutes
Milk cotton is a little specific, so if you don’t have it, just aim for a smooth sport weight yarn that gives you crisp stitches.
- Sport weight cotton: 2 Fine / Sport, usually around 50 g per ball. It gives the same clean stitch definition and keeps the pockets and flap from getting floppy.
- Sport weight acrylic: 2 Fine / Sport, often around 50 g per ball. It is easy to work with and still looks neat, just pick one that is not fuzzy so the edging stays sharp.
Quick Details
Here are the basics in one spot so you can get moving.
| Skill Level | Level 2 — Easy |
| Pattern Gauge | Gauge is not critical for this project. Use a hook size that creates a firm fabric appropriate for an accessory and produces neat single crochet stitches. |
| Finished Size | Approx. 18 sts wide body panel; length approx. 34 rows (plus turning chains) before assembly; ribbon approx. 60 ch long |
| Yarn Weight | 2 Fine / Sport |
| Fiber | Milk cotton (cotton blend) |
| Terminology | US |
Stitches & Abbreviations
Keep this list open while you crochet.
- ch = chain
- st = stitch
- Row = row
- sc = single crochet
- inc = increase (2 sc in same st)
- dec = decrease (sc2tog)
- sl st = slip stitch
- * = repeat
- [ ] = total stitch count in each row/round
- sp = space
Special Stitches
- Back bump slip stitch (in chain): Work sl st into the back bump of each chain across.
Important Notes
Abbreviations are in US terminology. Pieces are worked in rows with turning chains unless otherwise noted, so you will be working flat for most of it. Pockets are made twice and crocheted onto the body panel during assembly. There’s an optional 4 mm crochet hook listed, so use it if it gives you a firmer fabric and cleaner single crochet.
Let’s Make the Halloween Cat Crochet Pattern
We’ll crochet the panels and small details first, then assemble everything in the finishing steps.
Body Panel
This is the main base piece the pockets get attached to. Work in rows, turning at the end of each row.
Row 1: Starting from the 2nd ch from the hook, 1 sc in each ch. [18]
Row 2: Ch 1, turn, 1 inc, 16 sc, 1 inc. [20] Keep your increases tidy at the edges. It helps later when you’re crocheting pockets on.
Row 3: Ch 1, turn, 20 sc. [20]
Row 4: Ch 1, turn, 1 inc, 18 sc, 1 inc. [22]
Row 5: Ch 1, turn, 22 sc (26 rows). [22] This line tells you to keep repeating this row until you’ve completed a total of 26 rows for the body panel section up to this point.
Row 31: Ch 1, turn, 1 dec, 18 sc, 1 dec. [20] These decreases are placed at the edges, so count carefully and don’t accidentally decrease into the wrong stitch.
Row 32: Ch 1, turn, 20 sc. [20]
Row 33: Ch 1, turn, 1 dec, 16 sc, 1 dec. [18]
Row 34: Ch 1, turn, 18 sc. [18]
Cut yarn. Fasten off, weave in ends
Pockets (Make 2)
You’ll crochet two matching pockets in rows. These get positioned on the body panel during assembly, so try to keep your tension consistent between pocket one and pocket two.
Row 1: Starting from the 2nd ch from the hook, 1 sc in each ch. [18]
Row 2: Ch 1, turn, 1 inc, 16 sc, 1 inc. [20]
Row 3: Ch 1, turn, 20 sc. [20]
Row 4: Ch 1, turn, 1 inc, 18 sc, 1 inc. [22]
Row 5: Ch 1, turn, 22 sc (11 rows). [22] Same idea as the body panel note. Continue working this row until you’ve completed 11 rows total for each pocket.
Cut yarn. Fasten off, weave in ends
Pocket Flap
Go back to the first row of either pocket (your choice) where you previously crocheted 18 sc to join it with the body panel. Choose the middle 8 sc out of 18; these 8 stitches will be the base for crocheting the flap. Take a second to mark those 8 stitches if you like, because it’s easy to drift off center here.
Row 1: Join yarn, ch 1, 1 sc in each st. [8] Join cleanly so the flap edge doesn’t get bulky. I like to pull the join tail snug and deal with weaving it later.
Row 2: Ch 1, turn, 8 sc (6 rows). [8] Keep repeating this row until you’ve completed 6 rows total for the flap section up to this point.
Row 8: Ch 1, turn, 3 sc, ch 2, skip 2 sc, 3 sc (2 rows). [6] The ch-2 is your buttonhole opening. When you “skip 2 sc,” make sure you’re skipping the next two stitches in line, not the turning chain.
Also includes 2 ch for the buttonhole opening as written: [6 sc, 2 ch]
Row 10: Ch 1, turn, 3 sc, 2 sc in ch-2 sp, 3 sc. [8] Work into the ch-2 space, not into individual chains. That keeps the opening usable and the edge neater.
Row 11: Ch 1, turn, 8 sc (2 rows). [8] Repeat this row until you’ve completed 2 rows total for this part.
Row 13: Ch 1, turn, 1 dec, 4 sc, 1 dec. [6] These decreases shape the flap end. Don’t rush them. A sloppy decrease is the first thing you notice later.
Row 14: Ch 1, turn, 1 dec, 2 sc, 1 dec. [4]
Cut yarn. Fasten off, weave in ends
Flap Edging
This edging is worked continuously around the flap. Start at the bottom right side and join yarn to begin.
Ch 1, work 14 sc along the first side, 4 sc across the last row of the flap, and 14 sc along the third (last) side. Work into the row ends evenly as you go. If you tend to place too many stitches along edges, slow down and count them out so you land on 14 cleanly.
Fasten off, weave in ends
Keyring Loop
This small strip becomes a loop for your keyring hardware. Go back to the middle 2 sc out of 4 sc on the body panel between the two pockets.
Row 1: Join yarn, ch 1, 2 sc. [2] Use the exact middle two stitches so the loop sits where it’s meant to during assembly.
Row 2: Ch 1, turn, 2 sc (6 rows). [2] Repeat this row until you’ve completed 6 rows total for the loop strip.
Cut yarn leaving a long tail. Sew the final row along the bottom of the 1st row to form a loop.
Ribbon
This is a simple chain ribbon with slip stitches worked back through the back bumps. It’s a small detail, but the back-bump path gives you a cleaner edge than working into the top loops.
Row 1: Ch 60. [60]
Row 2: Sl st in each back bump of the chains to the end. [59] Keep your slip stitches relaxed. If you yank them tight, the ribbon can get stiff and fiddly to tie.
Fasten off, weave in ends
Final Touches
Place each pocket on either side of the body panel. Make sure the rows are aligned and positioned directly against one another. I line up the bottom edges first, then check the sides, then pin. Begin at the corner of the last row of the body panel (or at any starting point of your preference), and insert your hook through both the body panel and the pocket. You’re crocheting the pocket onto the body panel here, so keep both layers flat and don’t catch extra loops.
Work 15 sc along both the body panel and the pocket. Next, make 4 sc on the body panel alone. Those 4 stitches are the gap between pockets, so don’t accidentally stitch through the pocket edge there. Continue with 15 sc along the body panel and the next pocket. Work 18 sc across the first row of the body panel and the pocket. Then, make 15 sc along the body panel and the pocket. Make 4 sc on the body panel alone. Repeat 15 sc along the body panel and the final pocket. Finish with 18 sc along the last row of the body panel and the first row of the pocket. Cut yarn and weave in ends. If your counts don’t land you neatly at the corners, stop and check that you didn’t miss a stitch at a pocket corner. It happens.
Sew the final row of the keyring loop along the bottom of the 1st row to form a loop. Use the long tail you left and stitch through both layers with a few passes. Then weave that tail back and forth through the loop fabric so it doesn’t work loose.
Frequently Asked Questions
The body panel comes out about 18 stitches wide and about 34 rows long (plus turning chains) before I assemble anything. If your row height runs tall or short, the length is the first thing that shifts, so I keep an eye on that.
Use the 3 mm if you want the fabric to stay a bit tighter and hold its shape better. I grab the 4 mm when I want a slightly looser drape or I crochet tight by default, so there’s that.
Stick with 2 Fine / Sport if you want the dimensions to land where I got them. If you change yarn weight, the 18-stitch width and 34-row length won’t mean much anymore, and you’ll need to adjust until the panel looks right to you.
I make the ribbon about 60 chains long. If you want longer tails for a bow, add a few chains at the start rather than trying to fudge it later.
It’s Level 2 Easy, so I wouldn’t hand it to someone on their very first day crocheting. If you’re comfortable keeping your stitch count steady across rows and you don’t mind a little assembly at the end, you’ll be fine.
Now It’s Your Turn!
If you make this Halloween Cat Crochet Pattern, I want to see it. Leave a comment and tell me what hook you ended up liking, 3 mm or the optional 4 mm, because people crochet so differently and it’s always interesting. And if you’re the type who forgets where you found patterns, save this one to Pinterest now while you’re thinking about it. Future-you will be grateful, I think.