If you want a tiny bit of plant-y home decor you can crochet in an evening, this Mini Hanging Pot Crochet Pattern gives you a small textured planter with a hanging loop, plus the cute “soil” and leafy fronds to fill it.
About the Design
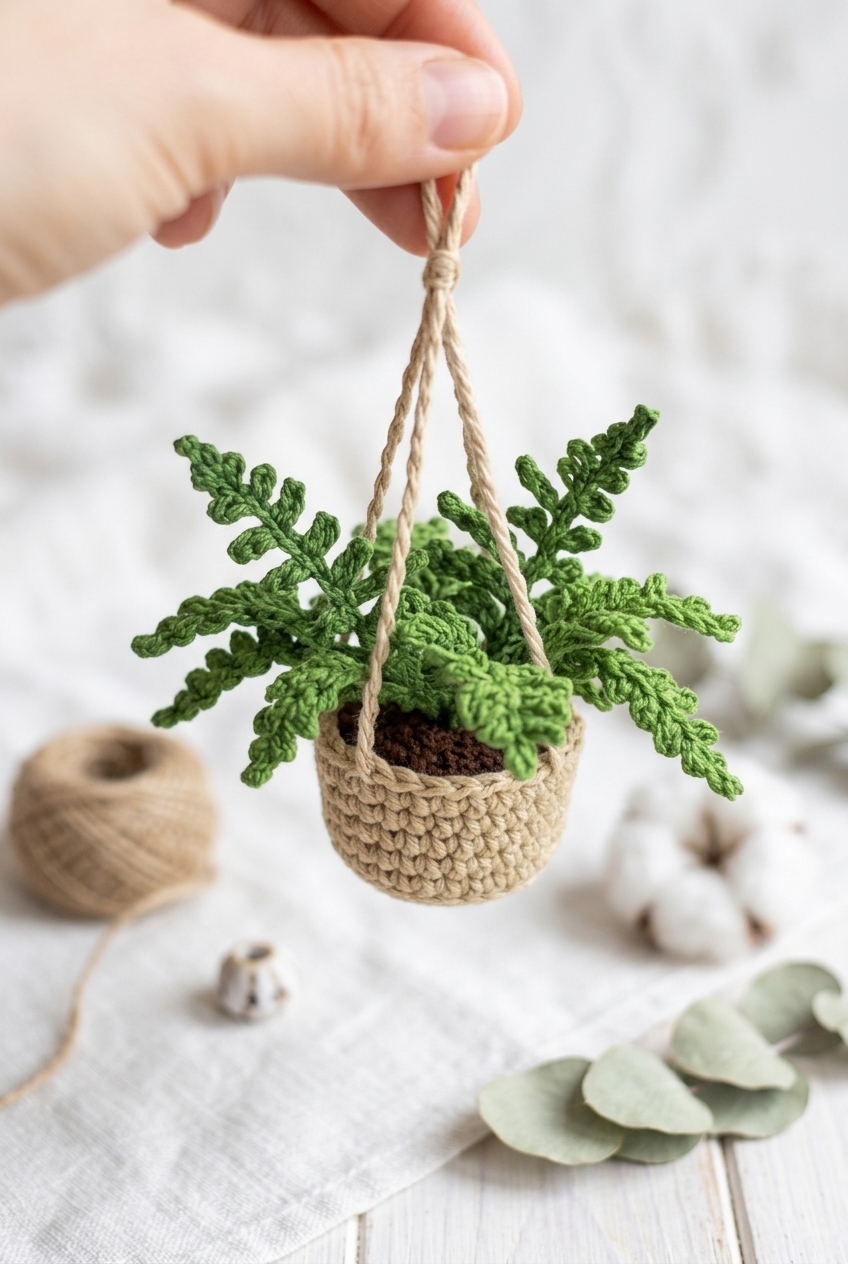
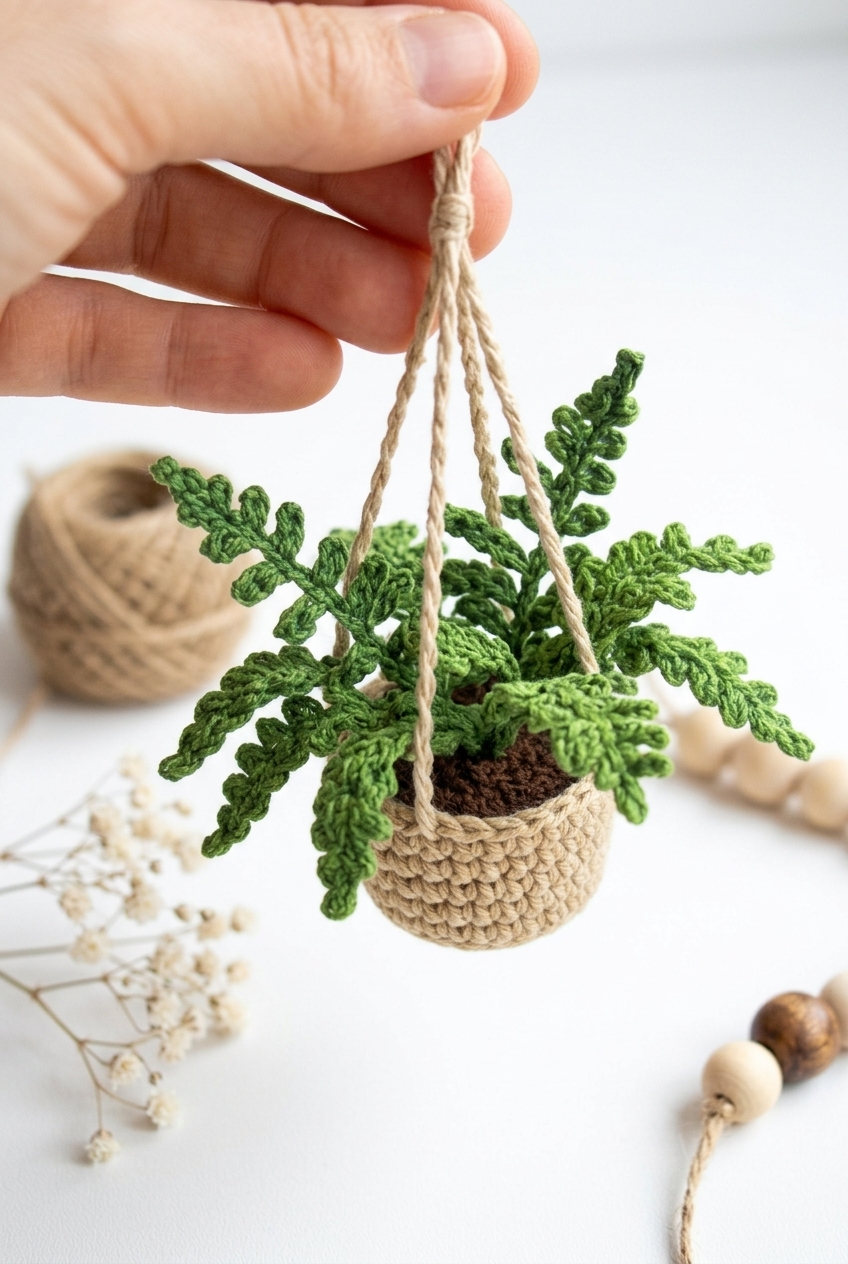
I went for that simple hanging-planter look, but in miniature. The pot is a warm beige or tan with a thick, bumpy texture you can actually see from across the room, and it holds a dark brown “soil” top with bright green leaves that fan out and branch a bit like little fronds.
Two matching beige cords come up from the sides and meet at the top in a loop, so it really reads like a tiny hanging basket instead of just a cup with a plant stuck in it. It’s a Level 2 easy kind of project, the sort of thing you can pick up, set down, and still know what you were doing when you come back (always a win).
Why You’ll Love This Pattern
It makes a realistic little hanging planter without taking up any real space.
Big texture: The stitch pattern gives the pot that chunky, basket-like look right away.
Built-in “plant”: You get the soil top and leafy fronds, so it feels finished.
Easy to hang: The two cords and top loop make it look like a real mini planter.
What You’ll Need
You will use two hook sizes and just two cotton colors here, with tiny amounts for the leaves and soil.
1 Super Fine / Fingering cotton yarn: For this project I reach for fingering cotton because it holds crisp stitches and keeps the little pot looking neat instead of floppy. Cotton also handles tight amigurumi-style tension with no trouble at all, so you get fewer gaps even before stuffing. You will need small amounts of nude/brown for the pot and soil (yardage not specified) and green for the leaves (yardage not specified).
2.5 mm (pot), 2 mm (leaves): The 2.5 mm keeps the pot fabric firm, and the 2 mm tightens things up for cleaner, sharper leaves.
Stuffing (minimal): You only need a little, just enough to give the pot some shape, so add it as you go before the opening gets too small.
Silicone gun: This makes it easier to place silicone neatly on the base without smearing it everywhere.
Silicone (for base and glue): It adds weight and grip to the bottom, and it also works as a quick way to secure parts if you want that extra hold.
Also needed: wool needle, scissors, stitch markers
Color Sequence & Yarn Changes
I work the pot and soil in nude/brown first, then switch to green for the leaves at the end. For clean color changes, finish the last yarn-over of the final stitch with the new color and pull the old tail snug.
At a Glance
Here are the quick specs so you can get rolling.
Skill Level
Level 2 — Easy
Pattern Gauge
Gauge is not critical for this project. Use a hook size that creates a tight, firm fabric so stuffing does not show through and the pot holds its shape.
Finished Size
Approx. 2.5 in (6.5 cm) diameter pot base and approx. 2 in (5 cm) tall pot; straps approx. 30 ch long each (length varies by tension).
Yarn Weight
1 Super Fine / Fingering
Fiber
Cotton
Terminology
US
Stitch Guide & Abbreviations
Keep this list open. It saves time.
beg = beginning
BL = back loop
ch = chain
MR = magic ring
rep = repeat
rnd = round
sc = single crochet
sl st = slip stitch
st(s) = stitch(es)
Special Stitches
Magic ring (MR): Form an adjustable loop, work the required number of stitches into the loop, then pull the tail to tighten the center closed.
Back loop only (BL only): Insert hook under only the back loop of the stitch (the loop farthest from you) and complete the stitch as instructed.
Before You Begin
This project is worked in joined or continuous rounds as indicated, so check the round notes as you go. Use stitch markers to track rounds. It keeps you from guessing later. The pot uses minimal stuffing, just enough to support the shape without bulging. Silicone is used to create a stable base and to adhere components, so plan that step before you start assembling. Make at least 8 leaves.
The Mini Hanging Pot Crochet Pattern Pattern Steps
Work through each section in order, then do the assembly at the end.
Crochet the Pot (Rounds)
This is the main container for the project. Minimal stuffing for the pot. Keep your round marker handy so you don’t drift, especially once the stitch count stays the same for several rounds.
Round 1: MR, 8 sc in MR. [8] Pull the magic ring closed firmly so the center doesn’t loosen later.
Round 2: 2 sc in each st around. [16]
Round 3: *1 sc in next st, 2 sc in next st* repeat around. [24]
Round 4: *1 sc in next 3 sts, 2 sc in next st* repeat around. [30]
Round 5: *1 sc in next 4 sts, 2 sc in next st* repeat around. [36]
Round 6: Working in BL only, sc in each st around. [36] This is the round that sets the turn for the pot. Make sure you’re truly in back loops only all the way around before you move on.
Round 7: Rounds 7–12: Sc in each st around. [36] Since nothing changes here, it’s easy to lose track. I tick off each round as I go.
Weave in ends and secure the top edge after completing Round 12.
Fasten off, weave in ends
Stabilize the Pot Base with Silicone
This step is what gives the pot a stable base. Silicone is used to create a stable base. Do this after the crochet pot is finished and before you start attaching anything that depends on the pot holding its shape.
Apply a layer of silicone inside the pot base in a circular motion, avoiding the edges. Place the pot on a flat surface and let the silicone dry completely. Keep it level while it dries so the silicone settles evenly, and don’t rush this part.
Let silicone cure fully before continuing
Make the Leaves (At Least 8)
These are worked with a smaller hook for a tighter finish. Use 2 mm hook. Repeat the leaf instructions to make at least 8 leaves. Leaf base shaping: Reduce the number of chains gradually from 6 to 5, then 4, and 3 chains for each segment. Each leaf should be symmetrical. Keep your tension steady so the sections match each other without fighting you.
Chain 6. Skip first 2 ch, sl st in 3rd ch from hook, sl st in each remaining ch. Repeat the above twice (for leaves with three sections). When you repeat, you’re building the next section right off the same base, so don’t cut yarn between sections.
Fasten off, weave in ends
Crochet the Hanging Straps (Make 2)
These are simple chains, but the tails matter for assembly. Leave a long strand of yarn at the beginning and end of the chain. Make both straps now so you can attach them evenly.
Ch 30 for each strap. Try not to twist the chain as you work. If your chains tend to come out tight, go up a hook size just for the straps so they don’t pucker when tied.
Fasten off, leave long tails for tying and sewing
Attach the Straps to the Pot
Now you’ll place and secure the straps so the pot hangs evenly. This is one of those steps where it’s worth pausing to count stitches before you commit.
Position each strap by skipping 12 sts between the two attachment points. Secure by tying knots at each connection point and sew the knots inside the pot. Keep the knots snug, then stitch them down so they can’t slide around with use.
Fasten off, weave in ends
Final Touches on Leaves and Straps
This is the quick adjustment pass before you call it done. You’re just placing what you’ve made so it hangs the way you want and adding an optional top loop.
Add any remaining leaves or adjust existing ones for a natural, drooping look. Add a loop at the top of the straps if desired. If you add the loop, use the same yarn and leave enough tail to knot and stitch it down securely.
Trim ends and secure all knots
Putting It All Together
Position the leaves at the center of the soil area. Use silicone glue to secure the leaves one by one. Trim excess yarn. For stability, tie the leaves together gently in the middle using extra yarn or a bow to hold them in place while sewing. Position each strap by skipping 12 sts between the two attachment points. Secure by tying knots at each connection point and sew the knots inside the pot. I like to dry-place everything first, then glue, then do the tying and sewing once I’m sure the spacing is right.
Baby & Child Safety Notes
If this will be handled by a child, secure every knot and weave in ends thoroughly so nothing can be pulled loose. Let silicone and glue cure fully before it’s used, and keep hanging cords out of reach for babies and toddlers.
Frequently Asked Questions
What size is the finished mini hanging pot?
My pot comes out about 2.5 in (6.5 cm) across the base and about 2 in (5 cm) tall. If yours lands a bit bigger or smaller, it usually comes down to tension, so there’s that.
How long are the hanging straps, and can I change the length?
I make each strap about 30 chains long, but the real length varies by tension. Add or subtract chains until it hangs where you want, then keep the two straps matched so the pot doesn’t sit crooked.
Why do you use two hook sizes in this pattern?
I use a 2.5 mm hook for the pot and a 2 mm hook for the leaves. The smaller hook keeps the leaves a little tighter and neater so they don’t look floppy next to the pot.
Can I use a different yarn weight than fingering?
I designed it with 1 Super Fine (fingering) yarn, so changing yarn weight will change the size right away. If you go thicker, expect a bigger pot and you may want to shorten the straps so it doesn’t turn into a long dangly situation.
Is this pattern beginner-friendly?
This is Level 2 Easy, so I wouldn’t hand it to someone on day one, but it’s not intense. If you can keep track of small stitches with a 2 mm to 2.5 mm hook, you’re in good shape.
Now It’s Your Turn!
If you make this Mini Hanging Pot Crochet Pattern, I want to see where you hang it. A shelf, a window hook, your desk lamp by accident, all of it. Save it to Pinterest so you don’t have to hunt for it later, and if you tweak the strap length or end up with a slightly bigger pot from your tension, tell me in the comments. I like hearing how these little projects behave in the real world, I think.
Hi, I'm Emma Collins! I crochet amigurumi, share patterns, and geek out over every tiny stitch. What began as a hobby turned into a creative space for crafters just like you.