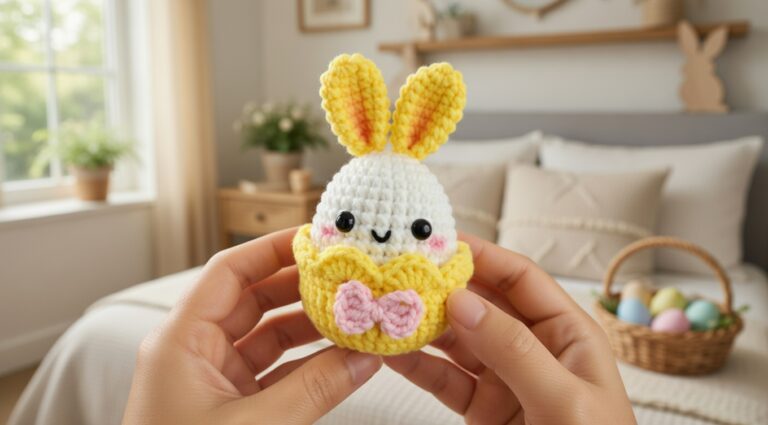
If you’ve been hunting for an Easter Carrot Crochet Pattern that’s cute, practical, and a little bit silly in the best way, this one gives you a plush carrot-shaped pouch that can also work as a toy. It’s right at home in Easter baskets and spring decorating, and it’s the kind of project you’ll want to make “just one more” of.
About This Project
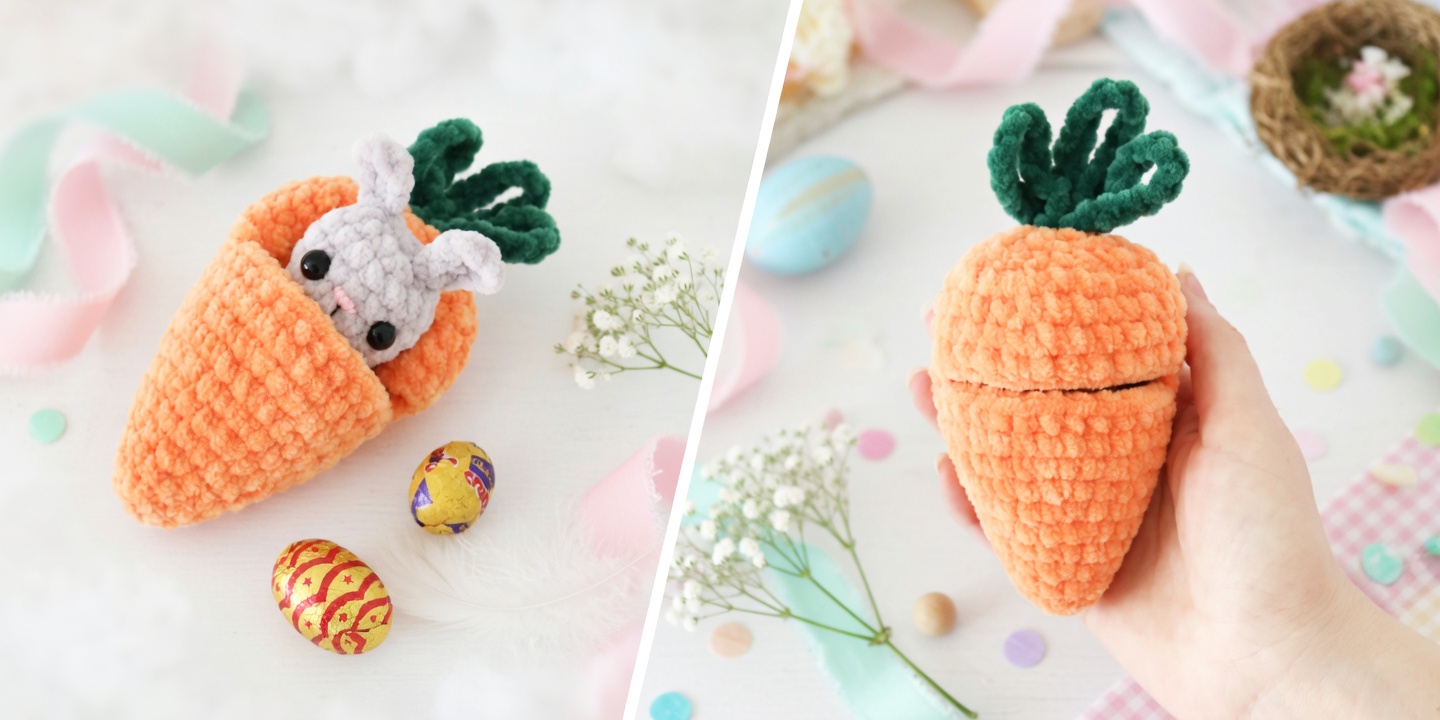
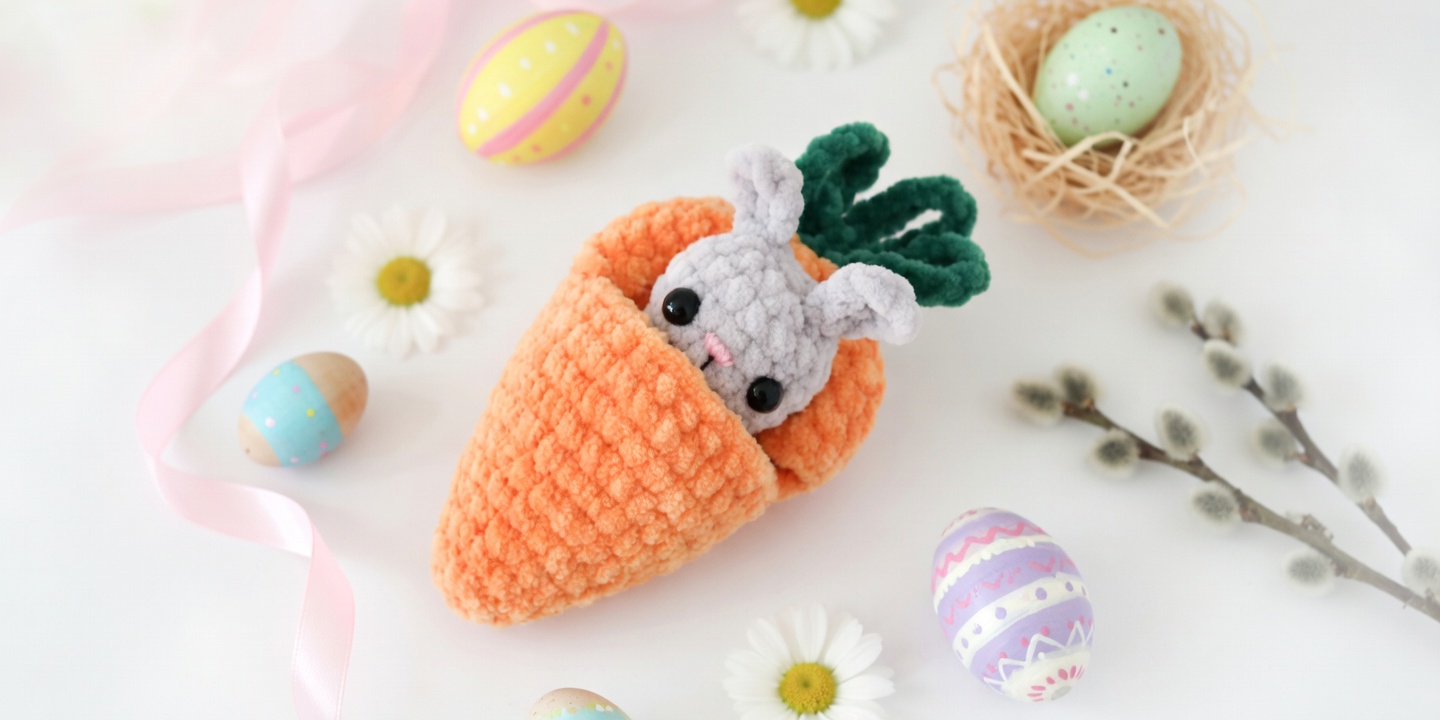
I designed this carrot to feel extra soft and chunky, with that bumpy, velvety texture you get from thick stitches. The body is a bright orange carrot shape with a rounded top, and there’s a dark green leafy cap that finishes it off so it reads as a carrot instantly, even from across the room.
My favorite detail is the little opening seam around the top, because it turns the whole thing into a pouch you can actually use. And if you want to lean into the cute factor, you can tuck a tiny crocheted bunny inside so it peeks out with upright ears, shiny black eyes, and a tiny pink nose and mouth (I mean, COME ON). It’s a Level 2 easy project, so it stays pretty simple while still feeling like you made something special.
What Makes This Pattern Special
You get a plush carrot that doubles as a usable little pouch.
- Two-in-one finish: It looks like a toy, but it also holds small treats or surprises.
- Big, cozy texture: The chunky stitch look makes it feel extra plush and squishy.
- Optional bunny peek: You can add a tiny bunny for instant personality without changing the whole project.
Gather Your Supplies
You’ll use two colors for the carrot and one green for the top, and the amounts are small and forgiving.
- 6 Super Bulky, 100% polyester yarn: For this project I reach for a super bulky polyester plush yarn because it makes the pouch feel thick and cozy, and it holds its shape without feeling stiff. Polyester also handles a lot of squeezing and handling, so the carrot stays looking neat. You’ll want a small amount of orange or tangerine for the carrot pouch and a small amount of green or emerald green for the carrot top, with yardage not specified for any of the colors.
- 4.5 mm crochet hook: This size gives you a firm fabric with this kind of yarn, so the stitches look clean and the pouch doesn’t feel floppy.
- Removable stitch marker: You’ll want this for keeping track of your rounds, since it’s easy to lose your place in plush stitches.
- Also needed: yarn needle, scissors
Color Sequence & Yarn Changes
Work the carrot pouch in orange or tangerine, then switch to green or emerald green for the carrot top. With plush yarn, I like to leave a slightly longer tail at color changes so weaving in stays put.
Essential Info
Here’s the quick setup so you can get right to stitching.
| Skill Level | Level 2 — Easy |
| Pattern Gauge | Gauge is not critical for this project. Use a hook size that creates a tight, firm fabric so the stitches are dense and the finished carrot holds its shape. |
| Finished Size | Approximately 6.5 in (16.5 cm) long. |
| Yarn Weight | 6 Super Bulky |
| Fiber | 100% Polyester |
| Terminology | US |
Stitch Guide & Abbreviations
Keep this list close while you work.
- ch = chain
- sc = single crochet
- inc = increase (2 sc in same st)
- invdec = invisible decrease (insert hook in front loop only of next 2 sts, yarn over, pull through 2 loops, yarn over, pull through 2 loops)
- sk = skip
- sl st = slip stitch
- st(s) = stitch(es)
- […] = repeat instructions in brackets as directed
- (…) = stitch count at end of round
Special Stitches
- Invisible decrease (invdec): Insert hook in front loop only of next 2 sts, yarn over, pull through 2 loops, yarn over, pull through 2 loops.
Pattern Notes
Gauge isn’t important for this pattern. Using a different yarn and hook size will change the size and look of the finished item. Pieces are worked in a continuous spiral, so you won’t join rounds unless the instructions tell you to. Mark the first stitch of each round with a removable stitch marker and move it up as you go. Finished size may vary depending on tension and materials used.
Let’s Make the Easter Carrot Crochet Pattern
Work the pouch first, then make the top, and we’ll put them together at the end.
Crochet the Carrot Pouch (Orange)
This is the main pouch, worked in joined rounds. Keep track of your round starts so the handle opening lands where you expect.
Round 1: Ch 2, 6 sc in 2nd ch from hook. [6] If you prefer, you can treat this like a tight little starter ring. Just make sure those 6 stitches aren’t loose.
Round 2: [inc] x6. [12]
Round 3: [sc] x12. [12]
Round 4: [sc, inc] x6. [18]
Round 5: [sc] x18. [18]
Round 6: Sc, inc, [2 sc, inc] x5, sc. [24] This round offsets the increases a bit. Don’t “fix” it to make it look symmetrical. It’s written this way on purpose.
Round 7: [sc] x24. [24]
Round 8: [3 sc, inc] x6. [30]
Round 9: [sc] x30. [30]
Round 10: [sc] x30. [30]
Round 11: [sc] x30. [30]
Round 12: 8 sc, ch 14, sk 14, 8 sc back on carrot. [30] When you chain, keep the chain relaxed but not sloppy. A tight chain can make the next round annoying to work into.
Round count given as [16 sc + 14 ch] in the source; total stitches around after working into the chain in the next round returns to 30.
Round 13: 8 sc, 14 sc along ch, 8 sc back on carrot. [30] Work into the chain in a consistent spot (top loop or back bump), then stick with it across all 14 stitches so the edge behaves.
Round 14: [sc] x30. [30]
Round 15: [sc] x30. [30]
Round 16: [sc] x30. [30]
Round 17: [3 sc, invdec] x6. [24] Keep your invdecs snug. If you tend to get gaps on decreases, slow down and pull up those loops evenly.
Round 18: [sc, invdec] x8. [16]
Round 19: [invdec] x8. [8]
Cut yarn leaving a tail and pull through last st. Weave the yarn tail through the front loops only of the final round and pull to close. Weave in end inside carrot.
Make the Carrot Top (Green)
This piece is worked as one continuous construction. You’ll create a ring, then build chained loops from the same point so it’s easy to sew onto the pouch.
Ch 13, sl st into first ch, [ch 12, sl st into same ch as previous sl st] x2. As you make those repeated loops, aim your slip stitches into the same chain space each time so the base stays tidy. If your slip stitches want to tighten up, pause and let the hook do the work instead of yanking the yarn through.
Fasten off, weave in ends
Final Touches
Attach/sew the carrot top to the carrot pouch as desired. Use the yarn tail from the top (or a fresh strand of green) and stitch through the base ring of the top and into stitches on the pouch. Take small passes and check placement as you go. It’s easier to adjust before you’ve sewn all the way around, so there’s that. Weave in all ends securely. Run tails through several stitches, change direction once, then trim. If you’re giving this to a kid, don’t skimp on the weaving.
Baby & Child Safety Notes
Small crocheted pieces and loose ends can be a hazard. If this will be handled by babies or young kids, sew the carrot top on firmly, weave ends in extra thoroughly, and avoid adding anything that could pull off (buttons, beads, glued-on parts).
Frequently Asked Questions
Mine comes out about 6.5 in (16.5 cm) long. If yours lands a little shorter or longer, it usually comes down to how tightly you crochet and how much you tug on the fabric as you go.
I use 6 super bulky yarn here because it gives me that chunky, plush carrot fast. If you switch yarn weights, the carrot will change size and drape, so just expect it to look different, by any means.
Use a 4.5 mm hook if you want the same feel and scale I get. If you go up, you will get a bigger carrot with looser stitches, and if you go down, it tightens up and shrinks a bit.
It sits at Level 2. Easy. I would hand it to someone who already knows how to keep their stitches consistent and count without getting annoyed.
I treat it like a small accessory: a cute seasonal piece you can tuck into a basket, add to a gift, or set on a table. It is one of those projects that ends up traveling around the house for a while.
Happy Crocheting
If you make this Easter Carrot Crochet Pattern, I want to see it. Save it to Pinterest so you can find it again next spring (or next week, no judgment), and tell me in the comments what colors you went with, because I always think I’m going to keep it classic and then I don’t. Tag me if you share it too. I love spotting these little carrots out in the wild.