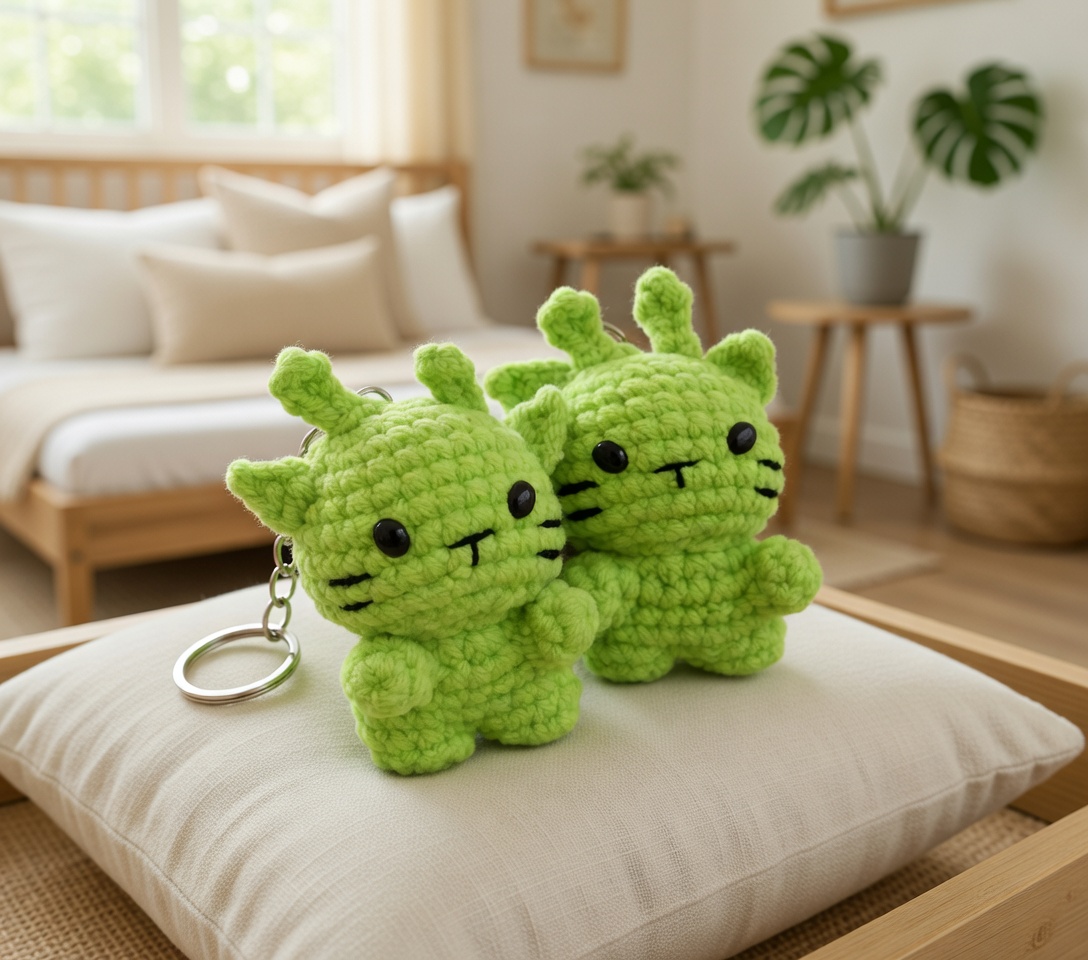
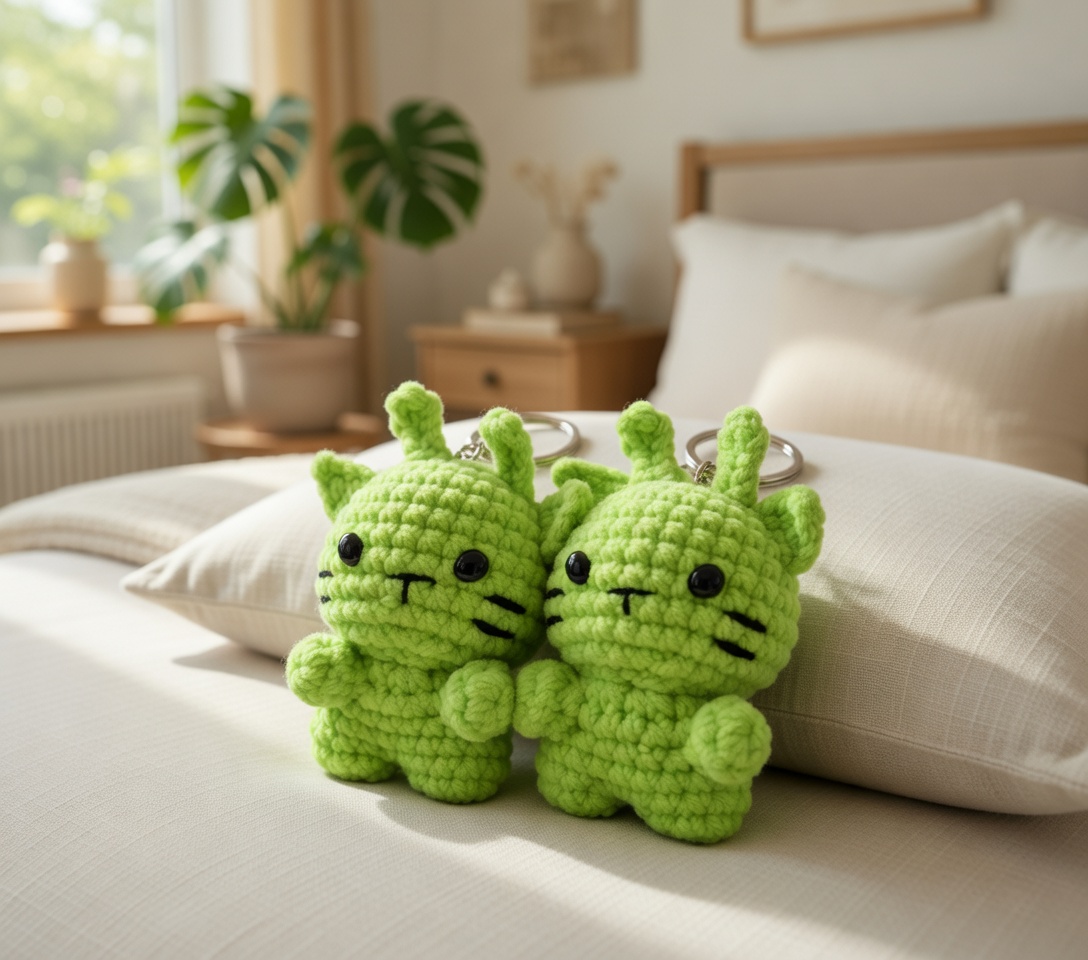
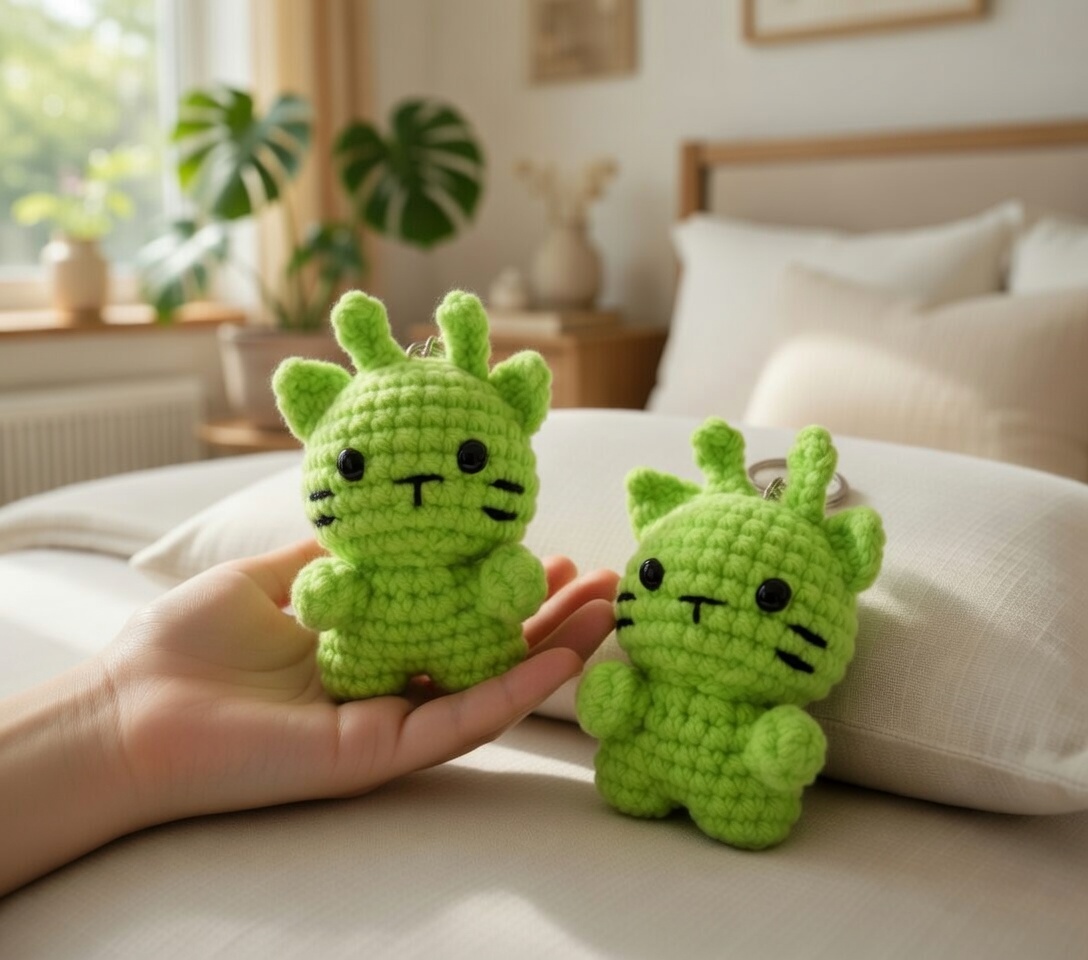
If you’ve been hunting for a tiny, weird-cute amigurumi to make in an afternoon, this Alien Cat Crochet Pattern gives you a bright little creature with a big head, squat body, and that “is it a cat or is it from space” vibe, plus an optional keychain finish.
The Inspiration
I wanted something that felt like a classic cat shape, but also… not a cat at all. So I went full lime green, kept the body rounded and chunky, and added those little horn and tentacle bumps around the top and sides of the head. It’s the kind of mini amigurumi that looks slightly suspicious on purpose, and I love that.
The face is simple: glossy black safety eyes, a tiny stitched mouth, and three short black stripes on each cheek for a bit of attitude. The texture comes out bumpy and tightly stitched, so it looks like a little alien critter instead of a smooth plush. It’s a Level 2 easy project, so it’s not trying to be fancy, it’s just trying to be FUN, you know.
Why This Pattern Stands Out
You get a bold, bite-sized alien cat with tons of personality.
- Quick little make: It’s small enough to finish fast without feeling like a whole production.
- That bumpy alien texture: The tight, nubbly look makes the lime green really pop.
- Keychain-ready vibe: It looks great as a tiny companion you can actually take with you.
Gather Your Supplies
This one is mostly green with a tiny bit of black for the face, plus a keychain ring if you want it to clip on.
- Worsted weight (4 Medium) cotton or acrylic yarn in green and black: For this project I reach for worsted weight because it builds a sturdy little shape without taking forever. Cotton gives you crisp stitches and a firm finish, and acrylic stays soft and springy, so pick the look you want. You will need green for the head, body, ears, arms, legs, and the keychain yarn loop (Option A), plus a small amount of black for whiskers and the mouth.
- 2.75 mm–3.5 mm hook: This range is great for amigurumi because you can size down for tighter stitches and less stuffing peek-through.
- Safety eyes: 6 mm (or 8 mm for a “big-eyed” look): I like 6 mm for a balanced face, and 8 mm if you want that extra cute, wide-eyed vibe.
- Polyester fiberfill stuffing: You only need a small handful, and it helps to stuff as you go before the opening gets tight.
- Keychain ring (split ring + short chain, or lobster clasp): Either style works, so use whatever you have and attach it the way you like best.
- Embroidery floss (black, optional alternative to black yarn): Floss gives you cleaner, finer whiskers and mouth lines if your black yarn feels a bit bulky.
- Also needed: stitch marker, tapestry needle (yarn needle), scissors
Essential Info
This is the quick stuff you’ll want in front of you.
| Skill Level | Level 2 — Easy |
| Pattern Gauge | Gauge is not critical for this project. Use a smaller hook than the yarn suggests to create a tight, firm fabric so stuffing does not show through. |
| Finished Size | approx. 2–3 in (5–7.5 cm) tall, depending on yarn/hook. |
| Yarn Weight | 4 Medium / Worsted |
| Fiber | Cotton or acrylic |
| Terminology | US |
Stitch Guide & Abbreviations
Keep this list close while you crochet.
- MR = magic ring
- ch = chain
- sc = single crochet
- inc = increase (2 sc in same st)
- dec = invisible decrease (insert hook in front loop only of next 2 sts, yo, pull up a loop, yo, pull through 2 loops)
- sl st = slip stitch
Special Stitches
- Invisible decrease (dec): Insert hook in front loop only of next 2 sts, yo, pull up a loop, yo, pull through 2 loops.
- Magic ring (MR): Work stitches into an adjustable loop, then pull tail to close.
Before You Begin
This is amigurumi, so you’ll be working in continuous rounds unless the pattern tells you to do something else. Use a stitch marker in the first stitch of each round and move it up as you go. Use a smaller hook than the yarn suggests for tight stitches, by any means, because you don’t want stuffing peeking through. Stuff firmly as you work, but don’t overstuff, especially if you’re turning it into a keychain.
Alien Cat Crochet Pattern Instructions
Work each piece in order, then set them aside for assembly at the end.
Head (Round-by-round)
Color: green. This is the main head piece, worked in rounds from the top down, then closed after stuffing.
Round 1: MR, 6 sc. [6]
Round 2: inc x6. [12]
Round 3: (sc, inc) x6. [18]
Round 4: (2 sc, inc) x6. [24]
Round 5: (3 sc, inc) x6. [30]
Round 6: sc around. [30]
Round 7: sc around. [30]
Insert safety eyes between Rounds 7–8, about 5–6 stitches apart (adjust for preferred expression).
Round 8: sc around. [30]
Round 9: sc around. [30]
Round 10: (3 sc, dec) x6. [24] Keep your decreases consistent (same style each time) so the shaping stays tidy.
Round 11: (2 sc, dec) x6. [18]
Round 12: (sc, dec) x6. [12]
Stuff the head firmly.
Round 13: dec x6. [6] If the opening gets tight, switch to a yarn needle for the last bit of stuffing adjustment before you fully close.
Fasten off, close the hole, weave in end.
Body (Round-by-round)
Color: green. You’ll build the body in rounds, then leave a long tail at the end so you can sew the head on securely.
Round 1: MR, 6 sc. [6]
Round 2: inc x6. [12]
Round 3: (sc, inc) x6. [18]
Round 4: (2 sc, inc) x6. [24]
Round 5: sc around. [24]
Round 6: sc around. [24]
Round 7: sc around. [24]
Round 8: (2 sc, dec) x6. [18]
Stuff lightly and shape into a rounded “bean.”
Round 9: (sc, dec) x6. [12]
Stuff a bit more.
Round 10: dec x6. [6]
Fasten off, close the hole, and leave a long tail for attaching the head.
Ears (Make 2)
Make 2. Color: green. Optional: lightly pinch into a triangle as you sew. These are worked in small rounds and then sewn onto the head.
Round 1: MR, 3 sc. [3]
Round 2: (sc, inc) x1, sc. [4] This round is easy to misread. Place the increase in the second stitch of the round sequence, then finish with the last sc.
Round 3: sc around. [4]
Fasten off, leave a tail for sewing.
Arms (Make 2)
Make 2. Color: green. Work these in rounds, then flatten and close the top so they’re ready to sew onto the body.
Round 1: MR, 6 sc. [6]
Round 2: sc around. [6]
Round 3: sc around. [6]
Round 4: sc around. [6]
Lightly stuff only the very bottom (optional). Flatten the top and sc across 3 stitches to close.
Fasten off, leave a tail for sewing.
Legs (Make 2)
Make 2. Color: green. These start at the foot and are closed at the top for sewing onto the body.
Round 1: MR, 6 sc. [6]
Round 2: sc around. [6]
Round 3: (sc, inc) x3. [9]
Round 4: sc around. [9]
Lightly stuff the foot area. Flatten the top and sc across 4–5 stitches to close.
Fasten off, leave a tail for sewing.
Face Details (Whiskers and Mouth)
Use black yarn or embroidery floss and a tapestry needle. Whiskers: add 3 short straight stitches on each side of the face (near the lower half of the eyes). Keep them short so they don’t snag. Mouth: make a tiny “u” shape or a simple small line centered below the eyes. Optional: add a tiny nose stitch above the mouth (very small triangle or dot). Tie off securely inside the head and weave ends through stuffing to hide them. I anchor the floss by taking a small stitch, splitting the yarn a bit, then knotting, so there’s that.
Fasten off, weave in ends.
Keychain Attachment Option A: Yarn Loop
Color: green. This makes a simple loop at the top of the head for threading a keyring through, and it’s quick to replace later if it wears.
Step 1: Insert the hook at the top of the head (near the magic ring area).
Step 2: Pull up green yarn and ch 8–12 (depending on ring size). Keep the chain snug so the loop doesn’t stretch out too much with use.
Step 3: Sl st back into the same spot to form a loop.
Step 4: Weave the yarn tail inside the head and knot securely (hide knots inside). If you can, run the tail through a couple different directions before trimming. It helps lock it in.
Step 5: Thread the keychain ring through the loop.
Fasten off, weave in ends.
Keychain Attachment Option B: Direct Stitching to the Chain Ring
This option skips the yarn loop and sews the hardware directly to the head, so it’s a good pick if you’re rough on keychains.
Step 1: Use a strong thread or doubled yarn.
Step 2: Stitch through the top of the head several times around the small chain of the keychain hardware. Aim to catch actual stitches in the head fabric each pass, not just stuffing.
Step 3: Knot inside the head and weave ends deep into stuffing. One solid knot is fine, but I usually do two, then bury the tail.
Fasten off, weave in ends.
Finishing & Assembly
Sew ears to the head: place ears on the top sides of the head (roughly between Rounds 3–6). Sew firmly around the ear base so they stand slightly outward. Use the ear tail and take small bites into the head fabric, then back through the ear edge, repeating around the base. If you’re doing the optional pinch-into-a-triangle, hold that pinch in place with your fingers while you take the first few stitches, then it behaves.
Attach head to body: center the head on the body. Use the long tail from the body (or head) and sew through both pieces with tight, even stitches. Go around at least twice for keychain durability. I like to stitch through a stitch on the head, then a stitch on the body, pulling snug each time, and then do a second pass that lands between the first stitches. It’s not fancy, it just holds.
Sew arms: attach arms to the sides of the body just below the head seam. Keep them slightly forward for a “hugging” look. Since the tops are already flattened and closed, you can sew straight through that edge, then into the body, and back again. Don’t catch too few strands on the arm edge or it can tear out over time.
Sew legs: attach legs near the lower front of the body, evenly spaced. Make sure the cat sits level. Pin or tack them in place with the yarn needle first if you want. Then sew through the closed top edge of each leg and into the body with the same tight, even stitches you used elsewhere.
Final check: tug gently on each part to confirm seams are secure. Trim and weave in all ends. If anything shifts when you tug, add a few more stitches now. It’s easier now than after the keyring’s been on for a week.
Attach the ring at the top center of the head.
Baby & Child Safety Notes
If this will be handled by a baby or young child, skip safety eyes and embroider the eyes instead. Keep whiskers and any small stitched details short and well anchored, and knot securely inside the head with tails woven deep into the stuffing so they can’t be pulled out.
Frequently Asked Questions
Mine lands around 2 to 3 in (5 to 7.5 cm) tall. Yarn and hook choice change it a bit, so if yours is a little taller or shorter, that’s normal.
I stick within 2.75 mm to 3.5 mm for this Alien Cat. If you want a tighter, firmer little amigurumi, I go smaller in that range. If you want it a touch bigger, I go up.
Worsted (4 Medium) is what I use here, so the 2 to 3 inch size makes sense. If you swap yarn weights, the Alien Cat will change size and the fabric feel will change too. I think that’s fine, by any means, just expect it to be different.
Hook size is the quickest lever. Go down toward 2.75 mm to shrink it up, or up toward 3.5 mm to bump the size. Yarn choice matters too, so if you grabbed a thicker or thinner worsted, that can nudge the height.
It’s Level 2 Easy, so I wouldn’t hand it to someone on their very first day with a hook. If you’ve made a small amigurumi before and you’re comfortable working with a smaller hook, you’ll be fine. Take it slow and keep your stitches consistent. That’s the whole game.
Before You Go
If you make this Alien Cat Crochet Pattern, I want to see your tiny weird space-kitty. Save this post to Pinterest so you don’t have to hunt for it later, and if you share a photo, tag me so I can actually find it. Also, tell me in the comments what colors you picked, because I always think I’m done and then someone mentions neon green and I’m like OKAY FINE, I need another one.