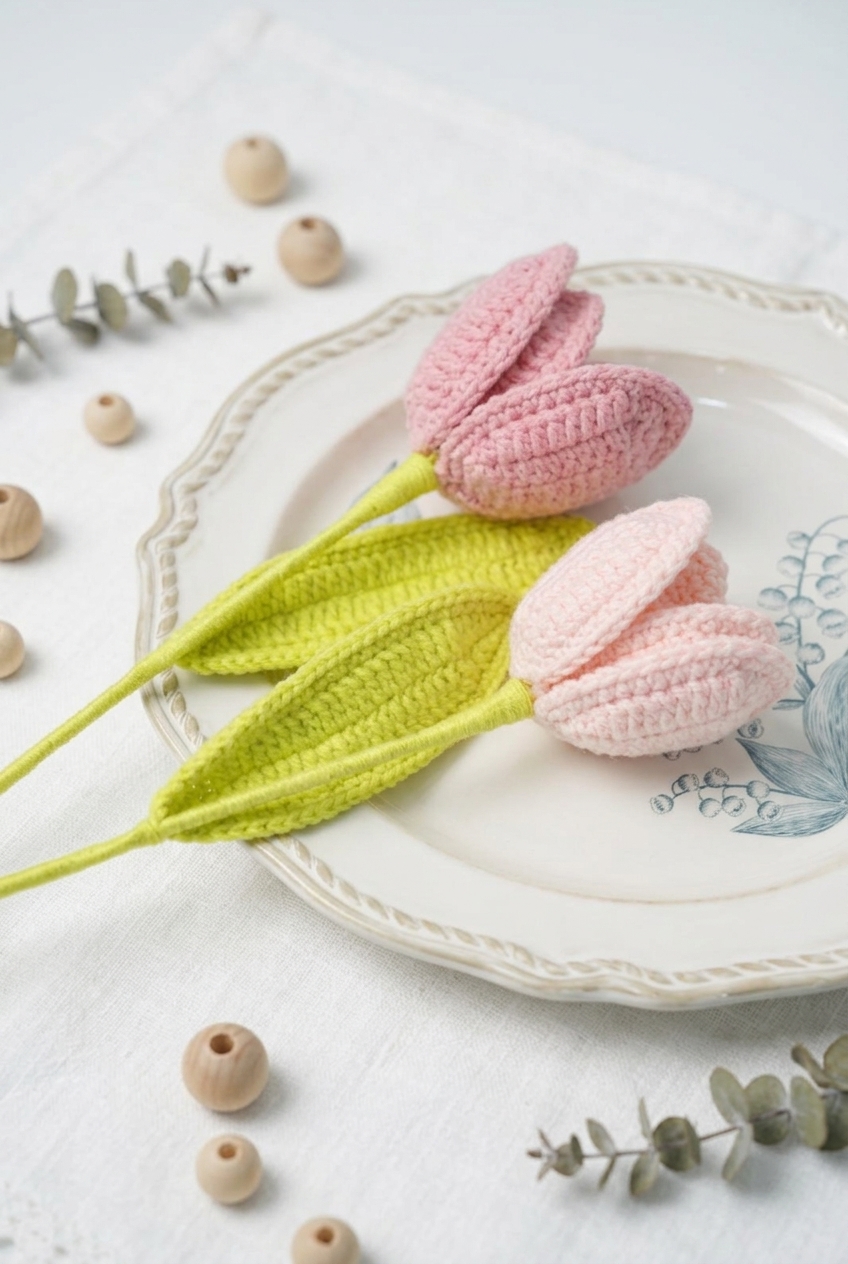
If you’ve been looking for a sweet little floral make, this Tulip Crochet Pattern walks you through creating two soft, closed tulip blooms with stems and leaves that look great in a small vase or tucked into a shelf display. It’s a very spring kind of project, the kind you put out when you’re ready for your home to feel a bit lighter.
About the Design
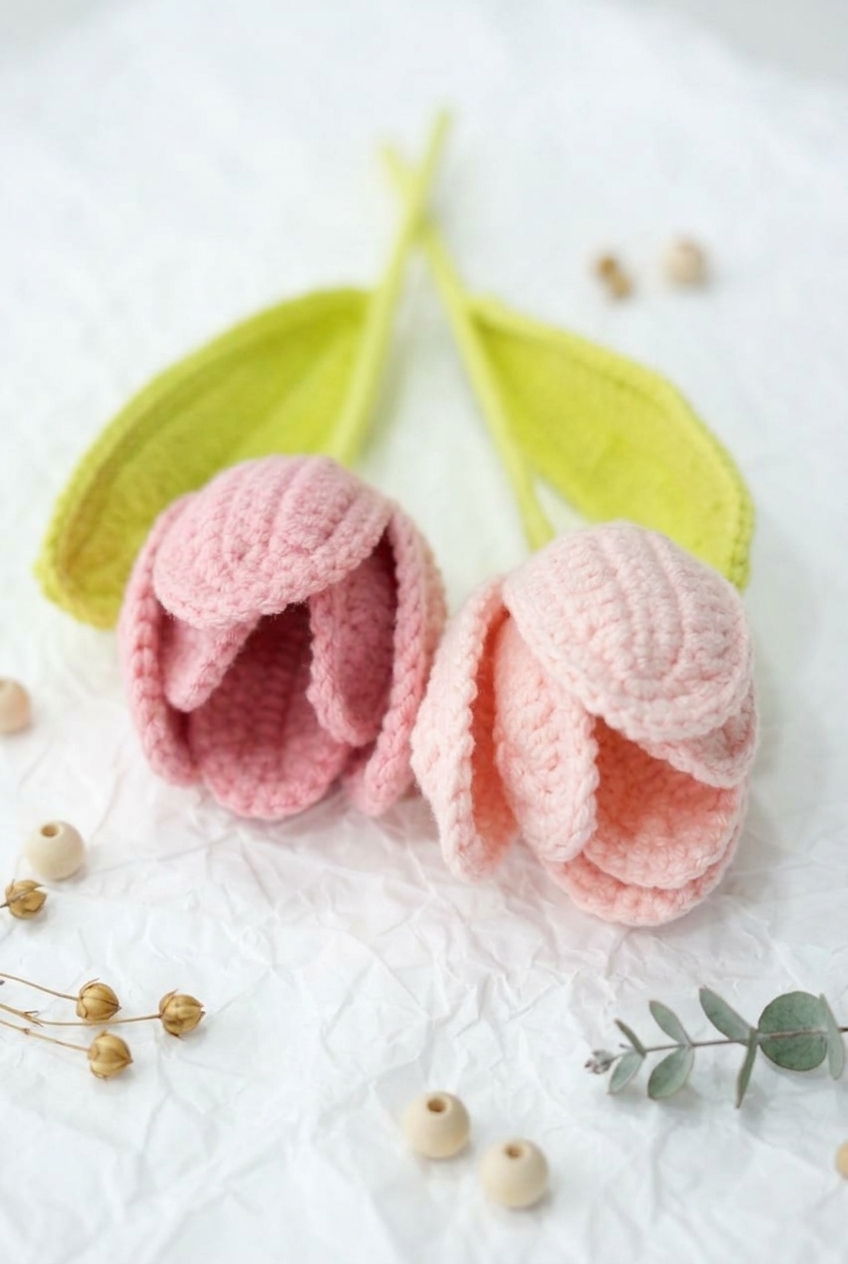
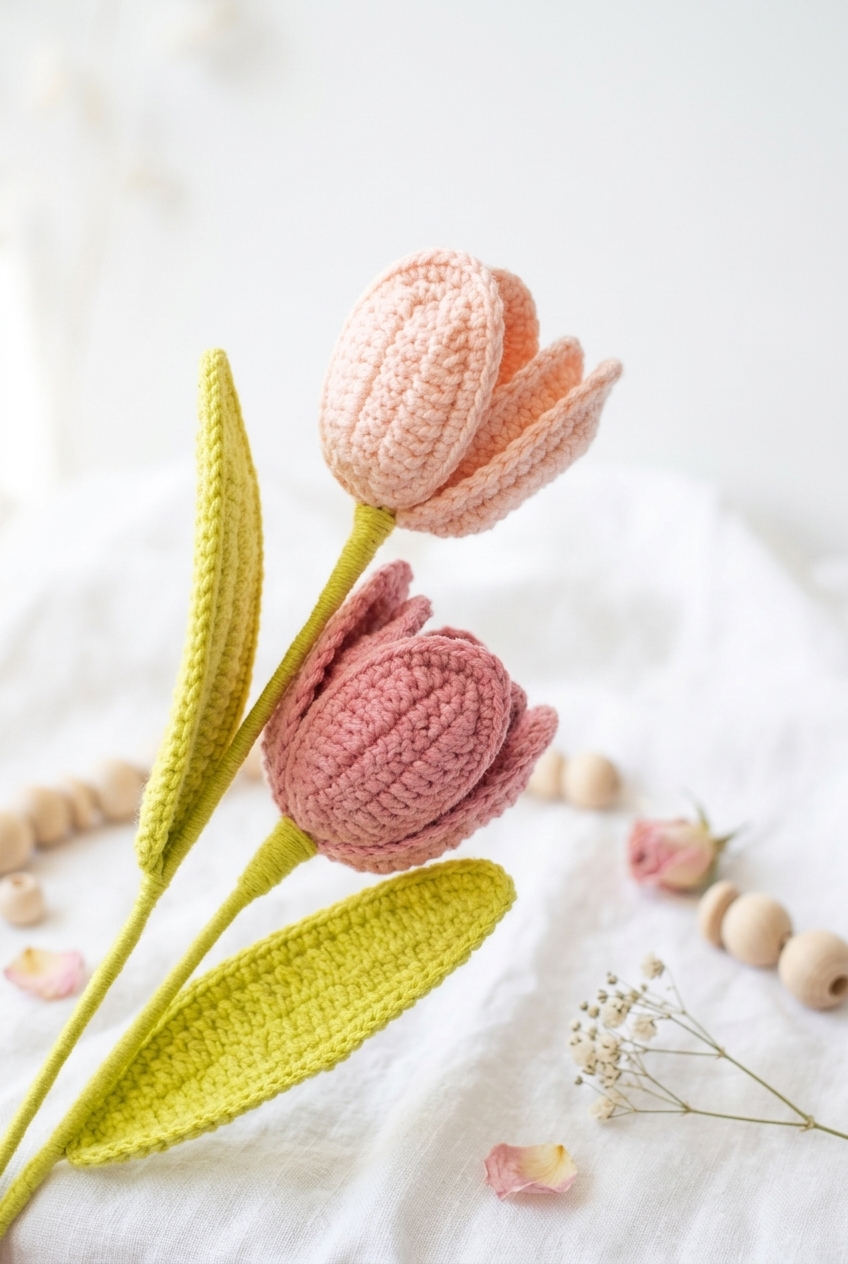
I went for that classic tulip shape that stays mostly closed, so it reads as a tulip right away without needing a whole bouquet to “explain” it. The petals are pale pink and rounded, with a soft, ribbed texture you can actually see in the stitches, and each flower has three petals that cup together into that tidy tulip silhouette.
The stems and leaves are a light green, and the leaves are long with a raised ridge down the center, like a real tulip leaf but a bit more structured. It’s Level 2 easy, so it’s not fussy, but it still feels like you made something real and finished (and not just a practice swatch pretending to be decor), I think.
Why You’ll Want to Make This
You get a neat, vase-ready tulip that stays pretty forever.
- Looks like a real tulip: The closed three-petal shape reads instantly, even from across the room.
- Great texture without drama: The ribbed petals and the leaf ridge add detail without making the project complicated.
- Easy home-decor win: One or two stems is enough to make a shelf, desk, or bedside table feel finished.
What You’ll Need
This flower uses small bits of fingering cotton in pink and green, plus a rod and wire to keep it standing tall.
- 1 Super Fine / Fingering, 100% cotton yarn (pink and green): For this project I reach for fingering weight cotton because it holds crisp petal edges and keeps the stitches neat without looking bulky. Cotton also has that slightly firm, dry feel that helps the flower keep its shape once you start adding the wire and wrapping the stem. Yardage isn’t stated for either color, but you only need small amounts of pink for the petals and center, and green for the leaf and stem wrapping.
- 2.5 mm crochet hook: This size pairs nicely with fingering cotton and gives you tight, clean stitches so the petals don’t go floppy.
- Flower rod, 30 cm long (No. 2): This is the main support inside the stem, so the finished flower doesn’t slump in a vase.
- Iron wire, 0.5 mm diameter: The thin wire is for shaping and holding the leaf and petal curves, and it’s still easy to bend by hand.
- Needle nose pliers: I use these to twist and tuck the wire ends neatly so nothing pokes through later.
- Hot melt adhesive: A small dab here and there helps lock the wrapped stem and any joined parts in place so they don’t wiggle around.
- Also needed: stitch marker, scissors
Color Sequence & Yarn Changes
You’ll be swapping between pink for the flower parts and green for the leaf and stem wrapping. I like to finish each piece completely and then fasten off, since carrying fingering cotton between sections tends to show.
Pattern Overview
Here are the quick specs so you can get moving.
| Skill Level | Level 2 — Easy |
| Pattern Gauge | Gauge is not critical for this project. Use a hook size that creates a firm fabric appropriate for shaping around wire. |
| Finished Size | Approx. 30 cm tall (based on 30 cm flower rod specified). |
| Yarn Weight | 1 Super Fine / Fingering |
| Fiber | 100% Cotton |
| Terminology | US |
Abbreviations & Stitches Used
Keep this list nearby while you crochet.
- ch = chain
- sc = single crochet
- hdc = half double crochet
- dc = double crochet
- sl st = slip stitch
- inc = increase (3 sc in one stitch)
- MR = magic ring
- st = stitch
Special Stitches
- inc (petal/leaf tip increase): Work 3 sc in one stitch.
- MR (magic ring): Form an adjustable ring and work stitches into the ring; pull tail to tighten.
Read Before Starting
You’ll make separate pieces, then assemble: Small Petals (make 3), Large Petals (make 3), Leaves (make 1), and the Flower Center (make 1). The inc used for petal and leaf tips is always 3 sc in one stitch, so don’t swap in a 2-stitch increase out of habit. This is meant to be shaped around wire, so aim for a firm fabric and keep your tension steady. Assembly order is up to you, but it’s simplest to finish the center first, then add petals, then add the leaf.
Let’s Make the Tulip Crochet Pattern
We’ll crochet the petals, leaf, and center first, then assemble everything onto the wired stem.
Small Petals
These are the smaller petals that sit closest to the center. Make 3. Keep your starting chain from twisting before you begin working back into it, because it’s annoying to notice later.
Round 1: Ch 13. Starting in 2nd ch from hook, work 1 sc, 1 hdc, 7 dc, 1 hdc, 1 sc. Inc in next st (3 sc in same st) to form petal tip. Then work 1 sc, 1 hdc, 7 dc, 1 hdc, 1 sc. Sl st to join, ch 1. [24] The “tip” increase is the turning point, so it helps to place a marker in that tip stitch if you tend to lose it.
Round 2: Add wire for structure. Work 12 sc along one side. Inc in tip st (3 sc in same st). Work 11 sc along the other side. Work 2 sc in last st. Sl st to join. [28] When you add the wire, keep it snug along the edge as you single crochet so it doesn’t shift around inside the stitches.
Fasten off, weave in ends
Large Petals
These petals wrap around the small petals to finish the flower shape. Make 3. You’ll add the wire on the last round, so don’t worry about it until you get there.
Round 1: Ch 13. Starting in 2nd ch from hook, work 11 sc. Inc in next st (3 sc in same st) to form petal tip. Work 10 sc along the other side. Work 2 sc in last st. Sl st to join, ch 1. [26] That last stitch with 2 sc can be easy to miss if your starting chain tail is in the way. Move it aside before you join.
Round 2: Work 2 sc in first st. Work 1 hdc, 8 dc, 1 hdc, 1 sc. Inc in next st (at the tip) (3 sc in same st). Work 1 sc, 1 hdc, 8 dc, 1 hdc. Work 2 sc. Sl st to join, ch 1. [30] The stitch mix changes here, so count as you go if you’re prone to drifting, especially across the dc run.
Round 3: Add wire for structure. Work 14 sc along one side. Inc in tip st (3 sc in same st). Work 13 sc along the other side. Work 2 sc in last st. Sl st to join. [32] If your wire is a little springy, hold it against the edge with your non-hook hand and let the stitches trap it in place.
Fasten off, weave in ends
Leaf
This is the single leaf that gets attached to the wrapped stem. Make 1. You’ll work around the foundation chain, then add an edging round to firm it up.
Round 1: Ch 30. Starting in 2nd ch from hook, work 2 sc. Work 3 hdc, 18 dc, 3 hdc, 2 sc. Inc in next st (3 sc in same st) to form leaf tip. Work 2 sc, 3 hdc, 18 dc, 3 hdc, 2 sc. Sl st to join, ch 1. [58] The tip increase is the pivot again. If you like, mark the middle sc of that 3-sc increase so Round 2 is easier to steer.
Round 2: Work sc evenly along one side of the leaf until you reach the tip. Inc in tip st (3 sc in same st). Continue working sc along the other side of the leaf. Work 2 sc in last st. Sl st to join. [62] “Evenly” is doing a lot of work here. Aim for stitches that sit cleanly along the edge without bunching, and don’t be afraid to adjust by skipping or adding a spot if your edge tension runs tight.
Fasten off, weave in ends
Flower Center
This center is what you’ll thread onto the floral wire first. Make 1. Keep your magic ring tail accessible so you can snug it down neatly at the end.
Round 1: Start with MR. Ch 8. Work 7 sc in 2nd ch from hook. Sl st to join to the MR. [7] You’re making a small chained loop anchored to the magic ring, so pull the MR closed after the join so it doesn’t stay loose.
Round 2: Repeat Round 1 exactly. [7] Keep the same tension as Round 1 so the three repeats stack consistently.
Round 3: Repeat Round 1 exactly. [7] If your slip stitch joins want to creep, pause and check you’re joining in the same spot each time.
Fasten off, weave in ends
Putting It All Together
Thread the floral wire through the flower center. Use pliers to bend the wire slightly at the top. Secure with a small amount of glue. The bend gives the center something to “catch” on, and the glue keeps it from sliding while you wrap.
Starting from the bottom of the flower center, begin wrapping the stem. Continue wrapping until you reach the desired stem length, then add the small petals in sequence. Wrap firmly enough that the tape grips itself, but don’t stretch it so hard that it snaps. As you add each small petal, hold it in place and wrap right over the base to lock it down.
Add the large petals in order around the small petals. Continue wrapping the stem. Place them where you want them before you commit with tape. Once the tape sticks, it’s possible to adjust, but you’ll feel like you’re wrestling it, so there’s that.
Wrap until you reach the appropriate position for the leaf, then attach the leaf and secure it by wrapping. Set the leaf against the stem with the base aligned where you want it, then wrap over the base several times so it can’t spin.
Continue wrapping to the end of the stem. Secure the end with a small amount of glue. Press the tape end down into the glue and hold it a moment so it bonds instead of popping up later.
Frequently Asked Questions
Mine comes out to about 30 cm tall when I use a 30 cm flower rod. If your rod is a different length, the finished height will follow that, so there’s that.
Use a 2.5 mm hook if you want the same look and scale I get with fingering weight yarn. If you switch hook sizes, the tulip will change size and the fabric feel will change too, and you might like it more that way.
You can, but it will not land at the same size. Fingering weight is what I use here to keep the tulip looking neat and not chunky, and it plays nicely with the 2.5 mm hook.
It sits at Level 2, Easy. If you can keep track of your rounds and you do not mind slowing down once or twice to check where you are, you will be fine.
I treat this tulip as home decor. It is the kind of make I leave in a vase or pop into a little arrangement when I want something cheerful without dealing with real flowers.
Before You Go
If you make this Tulip Crochet Pattern, I want to hear how you used it around your home. Single stem in a bud vase, a bunch in a jar, tucked into a gift wrap situation, all of it. Save it to Pinterest so you do not lose it (I lose things constantly), and if you post your tulip, tag me so I can see your color choices. I always end up thinking I picked the right shade until I see someone else’s, and then I’m like, OKAY, that was smart.