
If you’re craving a cute, squishy amigurumi make, this Cube Bunny Crochet Pattern walks you through a soft little plush bunny with upright ears and a tiny nose, and it fits right in with spring and Easter decorating and gifting.
Behind the Pattern
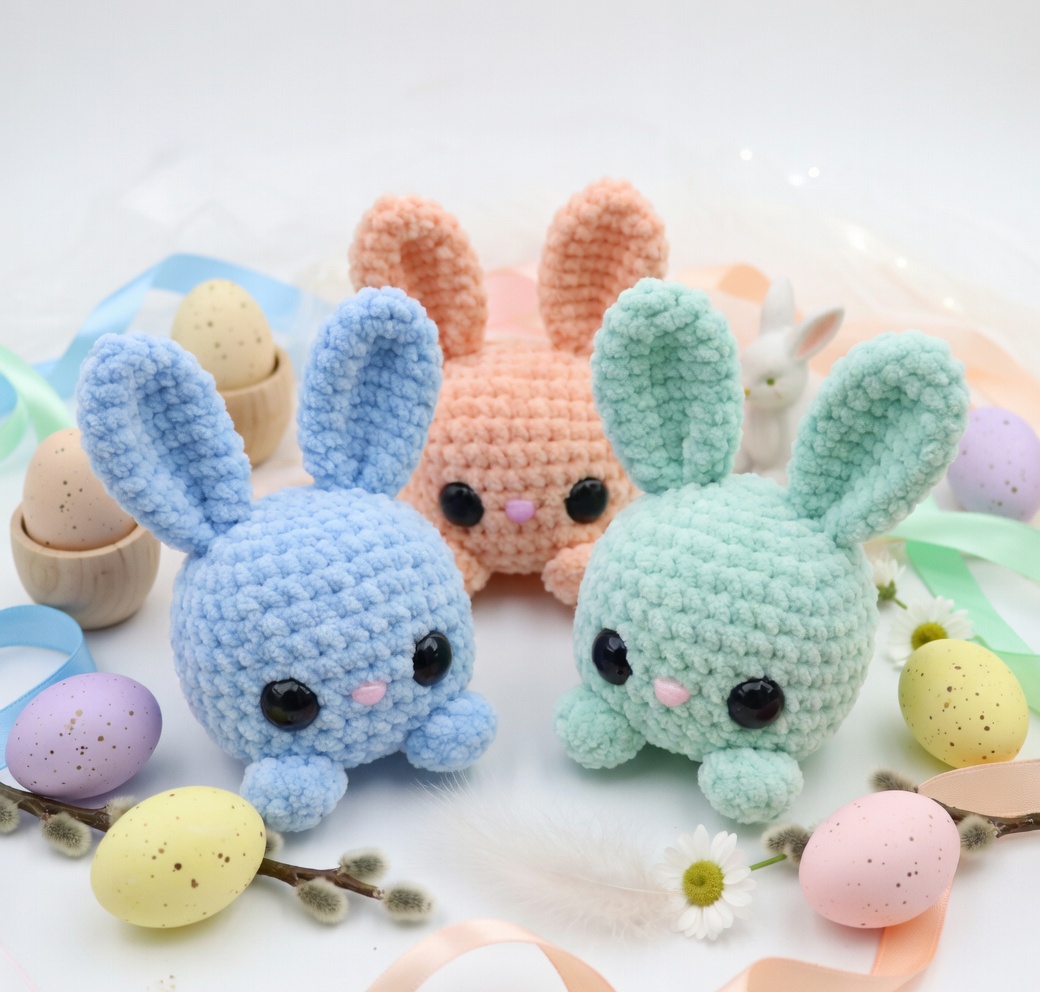
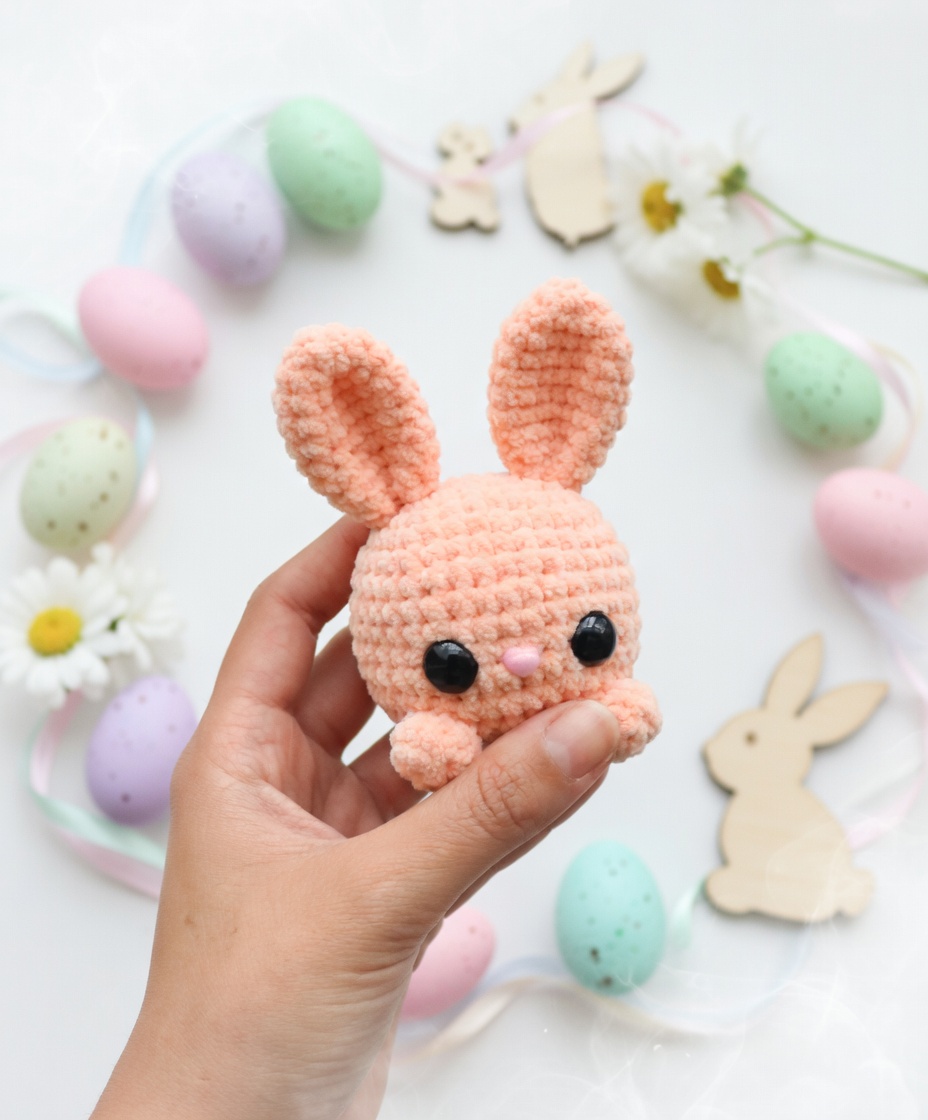
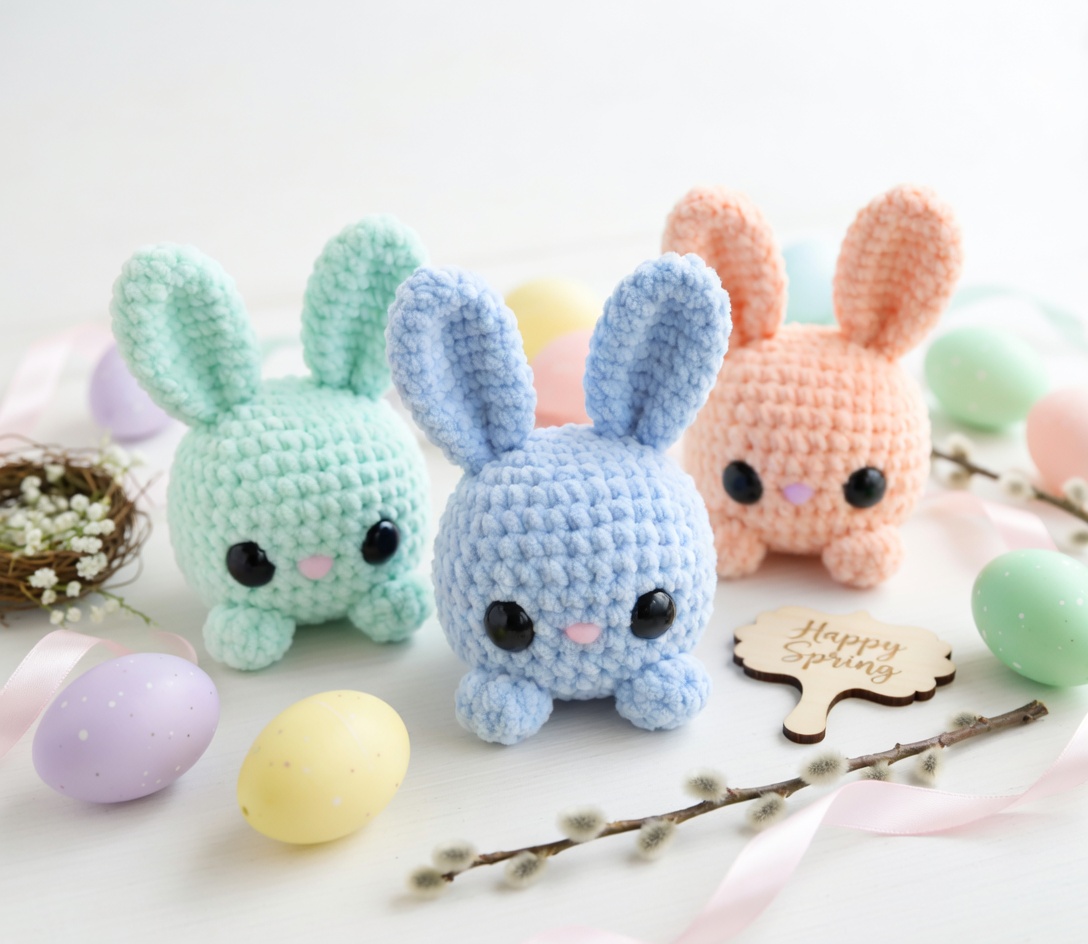
I wanted a bunny that felt extra huggable but still had a clean, simple shape, so this one leans into that rounded, almost blocky body look (in a good way). In the sample set, there are three bunnies in fluffy chenille: light blue, mint green, and peach, and they’ve got that soft, nubby texture that makes you want to keep petting them for no reason.
The face is intentionally minimal: shiny black safety eyes, a tiny pink nose, and that’s basically it. Add the little stubby paws and the upright ears and suddenly it has a lot of personality without me fussing over details. It’s a Level 2 Easy project, so it’s friendly if you’ve made a bit of amigurumi before and you’re ready for something that looks polished without being a whole saga.
Why You Need This on Your Hook
You’ll get an adorable plush bunny fast, with a look that really stands out.
- Quick payoff: The shape comes together without a bunch of fiddly little parts.
- Soft-factor is real: Chenille gives you that plush, cuddly finish right away.
- Make a whole trio: Changing colors makes each bunny feel totally different.
Materials You’ll Need
This little carrot companion uses three colors and the hook size changes by finished size, so keep that in mind.
- Yarn (chunky chenille for Large, medium-weight chenille for Medium, 3 Light / DK for Small; fiber not specified so check the yarn label): For this project I reach for chenille when I want that soft, plush look and a smooth finish on the body. It should feel velvety and a bit springy, and it helps if it is not so slippery that your stitches loosen up as you work. You will need orange, green, and a little pink, and the yardage for each color is not stated on this one.
- Hook size: 7 mm (Large) / 5 mm (Medium) / 3 mm (Small). These sizes pair well with the listed yarn weights and help you get a firm fabric so the stuffing stays put.
- 25 mm button eyes (Large): These give the Large carrot a bold, cartoony face, and they sit nicely on plush yarn.
- 20 mm safety eyes (Medium): Use the 20 mm size for the Medium version so the face looks balanced on the head.
- 8 mm safety eyes (Small): The Small version needs the 8 mm size so the eyes do not take over the whole face.
- Heart-shaped nose (Large): This is the nose shape for the Large size, and it reads clearly even with fuzzy yarn.
- 12 mm pink nose (Medium): The Medium size uses a 12 mm pink nose, and it is just enough contrast against the orange.
- Small heart-shaped pink nose (Small): For the Small size, this tiny heart nose keeps the face from looking crowded.
- Stuffing: You will need enough to fill the body firmly, and I like to stuff as I go before the opening gets too small.
- Also needed: scissors, tapestry needle, stitch markers
Alternative Yarns
Chenille is great, but it is not everyone’s favorite to crochet with. If you want cleaner stitch definition or less fuzz, these swaps work fine.
- Worsted weight acrylic: Medium weight, often around 200 to 220 yards per 100 g ball, and it is easier to see your stitches while still making a sturdy, squishy plush.
- DK weight cotton: DK / 3 Light, often around 250 to 300 yards per 100 g ball, and it gives a neat, firm fabric for a more classic amigurumi look.
Color Sequence & Yarn Changes
You will work mostly in orange for the body, switch to green for the leafy top, and use a tiny bit of pink for the nose. I like to cut and rejoin for the small pink piece rather than carrying it, since it can shadow through on lighter chenille.
Project Info
Here are the basics so you can get set up fast.
| Skill Level | Level 2 — Easy |
| Pattern Gauge | Gauge is not critical for this project. Use a hook size that creates a tight, firm fabric so stuffing does not show through. |
| Finished Size | Large / Medium / Small (exact dimensions not stated) |
| Yarn Weight | Chunky chenille (Large) / Medium-weight chenille (Medium) / 3 Light / DK (Small) |
| Fiber | Not specified — check the yarn label |
| Terminology | US |
Stitch Guide & Abbreviations
Keep this list open while you crochet.
- ch = chain
- inc = increase
- MC = magic circle
- rnd = round
- sc = single crochet
- sc2tog = single crochet 2 stitches together (decrease by 1)
- sc3tog = single crochet 3 stitches together (decrease by 2)
- sl st = slip stitch
Special Stitches
- Magic circle (MC): Form a magic ring, work the required number of single crochet into the ring, then pull the tail to close the ring.
Read Before Starting
This is an amigurumi project worked in continuous rounds, so don’t join unless the instructions tell you to. Use a stitch marker and move it up each round. For size options, you’re basically swapping hook, yarn, and face parts: Large Bunny uses a 7 mm hook with chunky chenille yarn, 25 mm button eyes, and a heart-shaped nose (or needle felt your own). Medium Bunny uses a 5 mm hook with medium-weight chenille yarn, 20 mm safety eyes, and a 12 mm pink nose. Small Bunny uses a 3 mm hook with DK weight yarn, 8 mm safety eyes, and a small heart-shaped pink nose. Face placement matters more than you’d think. Place the nose between Rounds 11 and 12 in the center of the face. For eyes over 15 mm, position them at the same level as the nose. For smaller eyes, place them 1 round above the nose.
The Pattern
Work through each piece in order, then set everything aside for assembly at the end.
Cube Bunny Body (Cube)
This is the main body piece, worked in continuous rounds. Work in continuous rounds. Keep a marker in your first stitch so your round counts stay honest.
Round 1-6: Round 1-6: Start with MC and gradually increase to create the top of the cube. [44] Don’t overthink the “gradually” part. Follow your usual increase spacing for a flat-ish start, and just keep your marker moving each round.
Round 7-13: Round 7-13: Work straight to create the sides of the cube. [40] This is the stretch where tension shows up. If your stitch height changes, the sides can get wobbly, so aim for the same pull on the yarn each round.
Round 14-17: Round 14-17: Decrease to close the bottom of the cube. [] If you’re stuffing this piece, do it before the opening gets small enough to fight you. Add stuffing in stages and push it into the corners as you go.
Fasten off, weave in ends
Legs (Make 4)
These are worked in rounds and you’ll make 4. Unstuffed. Keep them consistent so they sit the same when you sew them on.
Round 1: Round 1: 5 sc in MC. [5] If you prefer, you can start with a magic circle and pull it snug, since you’ll be sewing from the tail end anyway.
Round 2: Round 2: Inc around to 10 sts. [10]
Round 3-7: Round 3-7: Sc around. [10] Keep the tube unstuffed as noted. If it wants to collapse while you work, that’s fine. Just flatten it later when you position it for sewing.
Fasten off, leave a tail for sewing
Ears (Make 2)
Make 2 ears in rounds. Do not stuff. You’ll sew the end flat before attaching, so leave yourself enough yarn to work with.
Round 1: Round 1: 6 sc in MC. [6]
Round 2-3: Round 2-3: Increase to 18 sts over 3 rounds. [18] Pay attention to where your increases land from one round to the next. If you always stack them, you can get a ridge. Staggering them naturally helps.
Round 4-9: Round 4-9: Sc around. [18]
Round 10+: Round 10+: Gradually decrease to close the ear. [] As you decrease, stop and pinch the opening closed now and then to see if you like how it’s coming together. You’re going to sew the end flat anyway, so there’s some wiggle room, so there’s that.
Fasten off, sew the end of each ear flat
Tail (Pom-Pom Style)
This tail is worked in rounds and gets stuffed firmly. You’ll attach it near the bottom back during assembly, so leave a long sewing tail.
Round 1: Round 1: 6 sc in MC. [6]
Round 2: Round 2: Inc around. [12]
Round 3: Round 3: Sc around. [12]
Round 4: Round 4: Decrease back to 6 sts and stuff firmly. [6] Do the stuffing before the last few decreases tighten the opening too much. A small stuffing tool helps you pack it in without stretching stitches.
Stuff firmly.
Fasten off, leave a tail for sewing
Carrot Companion
This piece is worked as one continuous build. Materials: orange yarn for the carrot body; green yarn for the leafy top. Technique: Use a color change to create the transition from orange to green. Work the carrot body in orange, then switch to green at the point you want the leafy top to begin, making the change on the last yarn over of the stitch before the new color so the transition looks clean. Carrying yarn isn’t needed here. Just drop the old color and pick it back up only if your version calls for it.
Fasten off, weave in ends
Putting It All Together
Attach the unstuffed legs to the bottom corners of the cube body. Pin each leg in place first, then stitch through both layers with small, even whipstitches. Since the legs are unstuffed, you can flatten them slightly as you sew so they sit where you want them.
Sew ears to each side of the head, closer to the front than the back. Place one end on Round 4 and the other on Round 6. Use those round references as your anchor points, then sew along the flattened edge of the ear with the same yarn tail. Try to catch stitches on the body consistently on both sides so the ears land at the same angle.
Attach the stuffed tail to the back bottom of the body at Round 15. Center it where you like, then sew all the way around the tail base. Take an extra pass across the middle at the end. It keeps the tail from swiveling around during handling.
Position eyes approximately 2-3 stitches away from the nose on each side. Before you commit, set both eyes in place and step back for a second. If you’re using safety eyes, make sure the washers are fully seated. If you’re embroidering, knot and bury your thread tails inside the body so nothing works loose later.
Baby & Child Safety Notes
If this toy is for a baby or young child, skip safety eyes and use embroidered eyes instead. Pull all knots tight, weave in ends in multiple directions, and bury tails inside the body. Check that the ears, legs, and tail are sewn on with tight, repeated stitches since those spots get tugged.
Frequently Asked Questions
Use chunky chenille with a 7 mm hook for the Large bunny, medium-weight chenille with a 5 mm hook for the Medium bunny, or DK (3 Light) yarn with a 3 mm hook for the Small bunny. I stick to those pairings because the fabric feel matches the size I want, and it keeps the cube shape looking clean.
Pick based on yarn weight and hook size, since that’s what controls the scale here. When I want a quick, squishy amigurumi, I go Large with chunky chenille and a 7 mm hook. If I want something smaller and a little more defined, I make the Small version with DK and a 3 mm hook.
You can, but the bunny won’t land in the same size range. DK with a 3 mm hook gives you the Small scale, and chenille with a larger hook jumps you up fast. If you mix and match anyway, just expect the cube bunny to come out as its own size, so there’s that.
This is Level 2 Easy, so I think it’s a good early amigurumi project if you’ve already made a couple simple pieces. The only real trick is keeping your cube shape tidy by sticking with the hook size that matches your yarn.
Chunky chenille is what I use for the Large cube bunny, paired with a 7 mm hook. It gives that soft, plushy look fast, and the bigger stitches make the cube shape feel bold and simple.
Before You Go
If you make this Cube Bunny, I want to hear what size you chose and what yarn you grabbed for it. Save this pattern somewhere you’ll actually find it again later (I lose things constantly), and if you share a photo, tag me so I can see your little cube-eared buddy out in the wild. I’m always curious whether people go for the chunky chenille BIG bunny or the smaller DK version, I think.