
If you’ve been hunting for an Alligator Crochet Pattern that turns into a pair of cozy, goofy-cute plush slippers, you’re in the right place, because that’s exactly what you’re making here.
About the Design
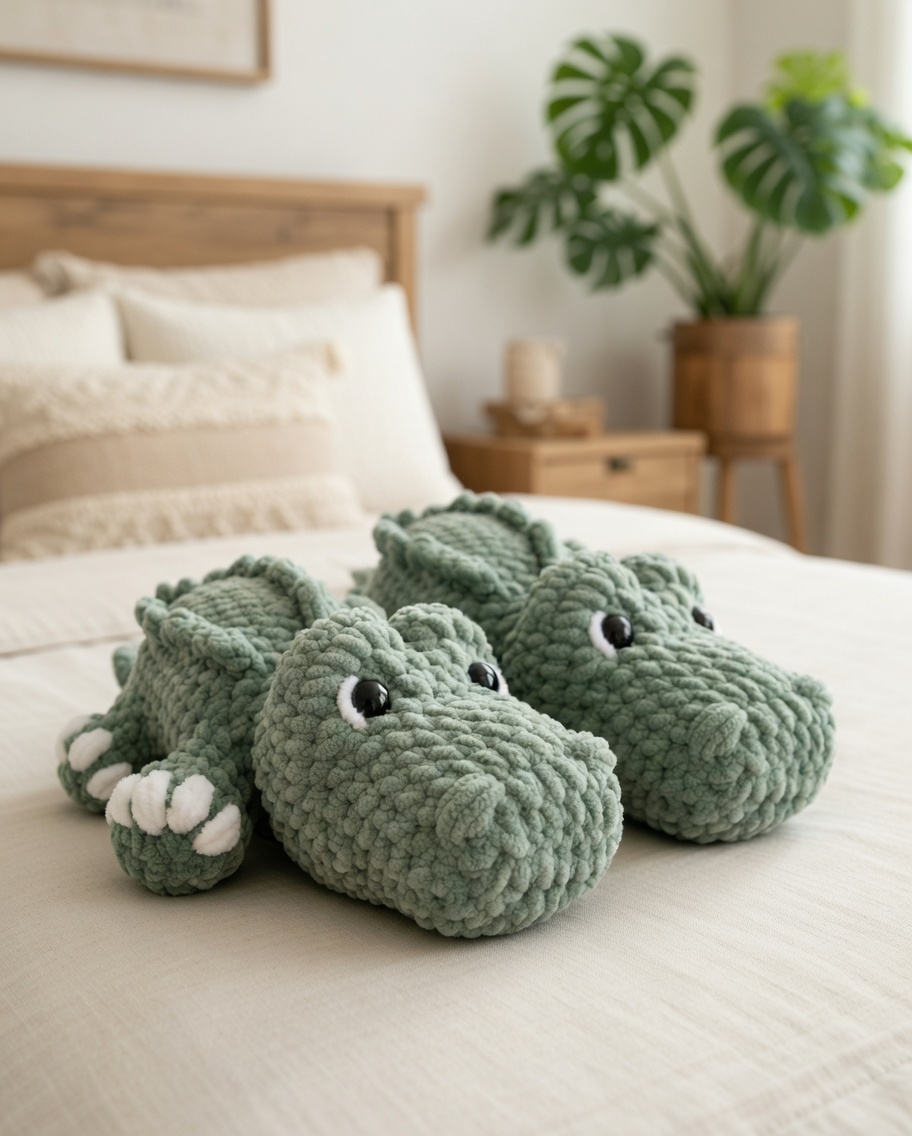
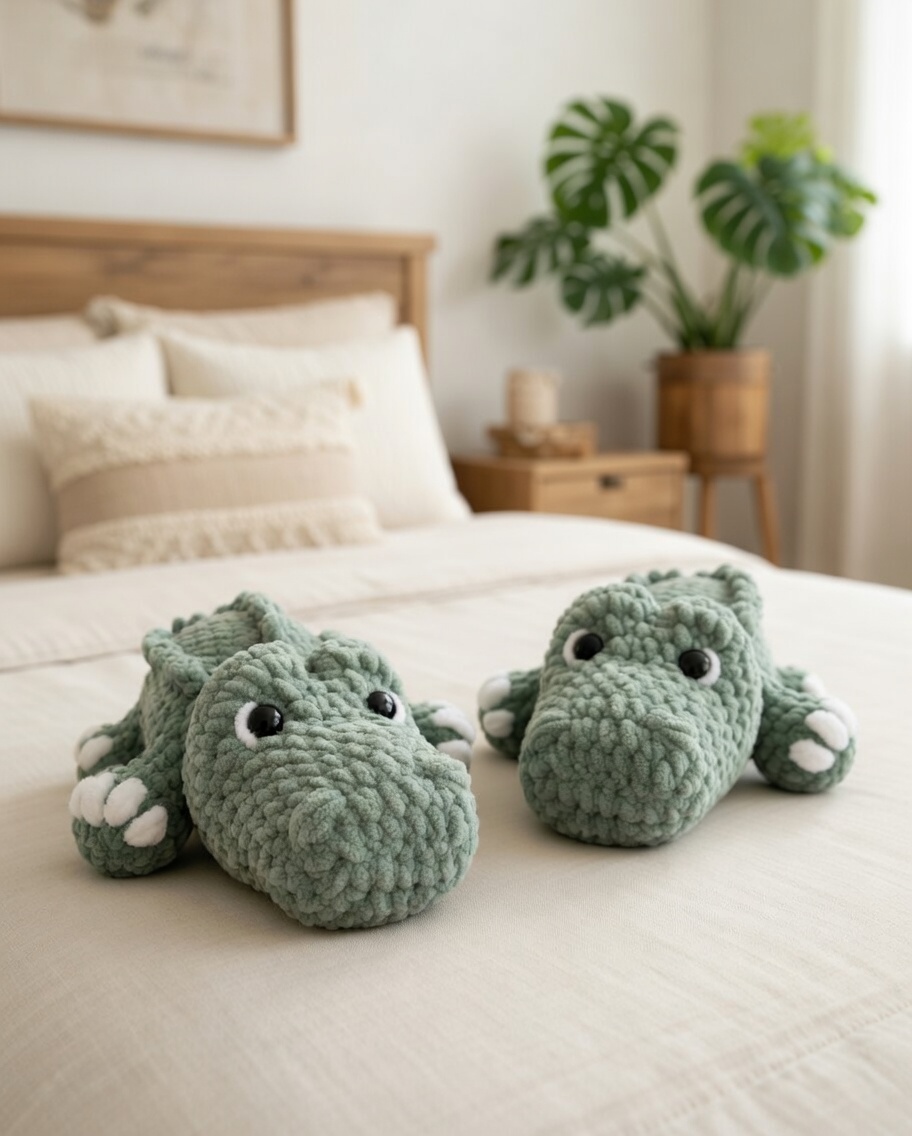
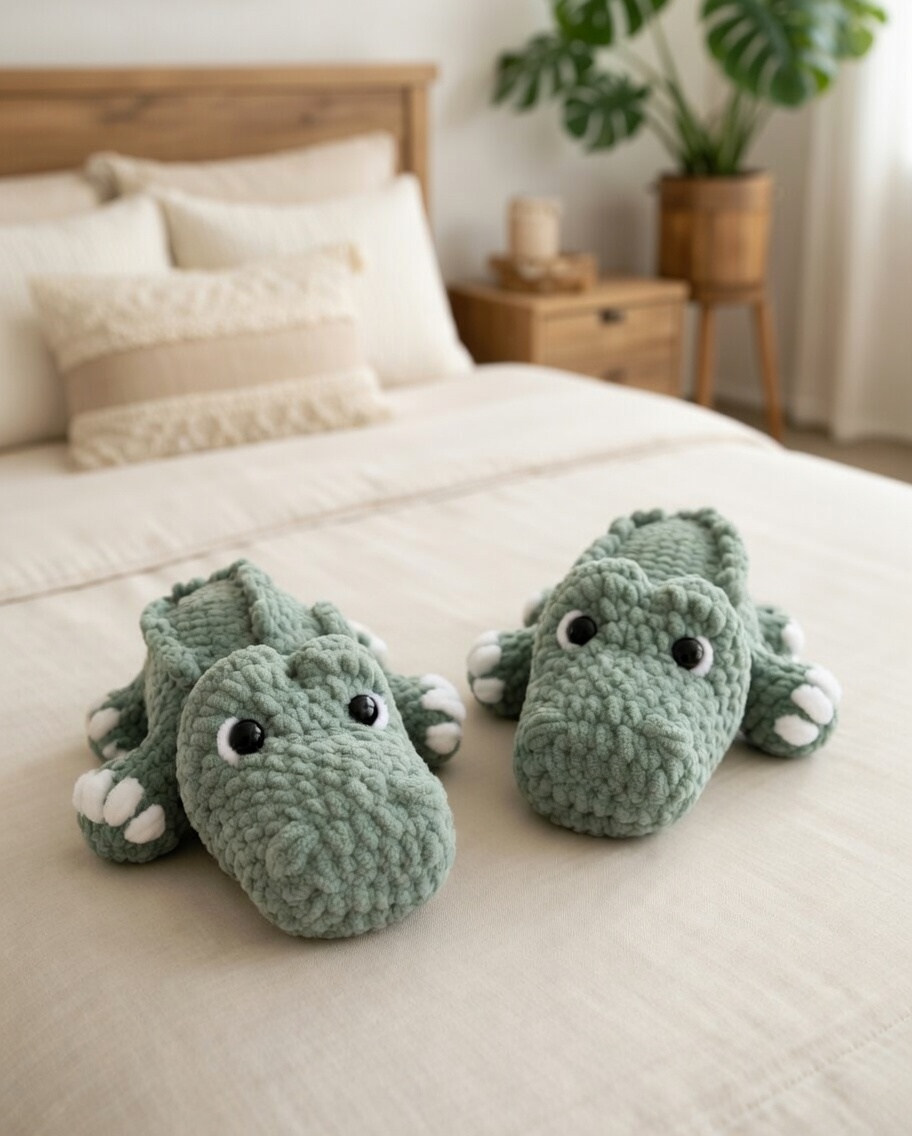
I wanted these slippers to feel like a soft little creature you can actually wear around the house, not just a basic slipper with a face stuck on. So the shape stays low and wide, like a crocodile or dinosaur head, with a rounded snout that sits out front and makes the whole thing look extra squishy.
The sample is worked in a calm sage green with a chunky, textured look, and that texture really does give it that scaly vibe without going overboard. On top, there are small raised ridges like spikes, plus big black-and-white eyes set on the sides, so it has that slightly silly, friendly expression. Then the front gets those white claw-like toes, because I couldn’t not add them (they’re my favorite part, I think). It’s a Level 2 easy project, so it’s more about enjoying the shaping and the details than wrestling with anything complicated.
Why You Need This on Your Hook
You’ll end up with slippers that look like a plush alligator head.
- Instant personality: The big side eyes, snout, and little ridges make them look alive.
- Fun texture: That chunky, bumpy stitch gives the “alligator” look without extra fuss.
- Details that pop: The white claws up front are small, but they sell the whole design.
What You’ll Need
This is mostly a one-ball project in super bulky yarn, with just a little white left for eyes and toes.
- 6 Super Bulky, 100% polyester yarn: For this project I reach for a super bulky polyester plush yarn because it builds a soft, chunky shape fast and hides stitches nicely. Polyester also holds up well to squeezing and handling, and it does not get stiff when you pack in the stuffing. You will need 1 ball of green for the head, body, tail, feet, spikes, nostrils, and face shaping, plus a small amount of white for the eye whites and toes.
- 5.00 mm crochet hook: This size keeps the fabric tight enough for stuffing, but it still glides through plush yarn without fighting you the whole time.
- 15 mm safety eyes: This size looks right with super bulky yarn, and it gives the face a clear expression without needing a lot of extra embroidery.
- Polyester fiber fill stuffing: You do not need a ton, but plan to stuff as you go so you can shape the head and body before the openings get small.
- Also needed: scissors, stitch marker, embroidery needle (optional), sewing pins (optional)
Yarn Substitutes
If you cannot find plush polyester, you can still make this work with other super bulky yarns. Just know the texture and stitch definition will change a bit.
- 6 Super Bulky chenille polyester: Usually around 100 to 150 yards per 100 g ball, and it gives the same squishy look with smooth stitches. It is a good swap if you want that plush feel, but you may need to tug stitches into place as you work.
- 6 Super Bulky acrylic or acrylic blend: Often around 80 to 120 yards per 100 g ball, and it is easier to see your stitches and count rounds. The finished piece will feel firmer and less plush, so pack the stuffing a little more carefully to keep it neat.
Color Sequence & Yarn Changes
Green carries almost the whole project, then you will pop in white for the eye whites and toes and switch right back to green. With plush yarn, I like to cut and rejoin for clean color edges instead of carrying the strand across.
Quick Details
Here’s the stuff you’ll want to check before you start.
| Skill Level | Level 2 — Easy |
| Pattern Gauge | Gauge is not critical for this project. Use a hook size that creates a tight, firm fabric so stuffing does not show through |
| Finished Size | Approx. 12 in (30 cm) long from nose to tail tip |
| Yarn Weight | 6 Super Bulky |
| Fiber | 100% Polyester |
| Terminology | US |
Stitches & Abbreviations
Keep this list open while you crochet.
- ch = chain
- sc = single crochet
- dc = double crochet
- sl st = slip stitch
- sk = skip
- inc = increase (2 sc in same st)
- dec = decrease (sc2tog)
The Critical Details
This is an amigurumi worked in joined rounds as written. Round 1 includes the slip stitch join, and after that you’ll keep following the joins exactly where the pattern tells you. Use a stitch marker to keep track of rounds.
Insert the safety eyes in Round 9, spaced 5 stitches apart. Stuff the head firmly, and push extra stuffing into the eye and cheek area so the face holds its shape. Stuff the body where the pattern notes it, then start stuffing the tail at Round 37 and keep adding stuffing as you finish each round.
One more thing. Adjust for tension as you go. You may need to add or subtract single crochets from either side of the eye or leg rounds so everything lines up.
Crochet Instructions
Work through each section in order to build the pieces of the Alligator Crochet Pattern and add the details at the end.
Head (start at the nose)
This section starts with an oval base and then builds up in rounds. With green plush yarn, make a slip knot. ch 7. Keep a marker handy because the first round is where it’s easiest to lose your place.
Round 1: Sk 1 ch, sc in next ch (place marker), 4 sc, 3 sc in 1 ch, 5 sc, 3 sc in 1 ch, sl st in first marked st. [16] The marker goes in that first sc so you can clearly see where the round begins before you join with the sl st.
Round 2: (sc, inc) x8. [24]
Round 3: 24 sc. [24]
Round 4: 24 sc. [24]
Round 5: 24 sc. [24]
Round 6: 24 sc. [24]
Round 7: 24 sc. [24]
Round 8: (5 sc, inc) x4. [28]
Round 9: 15 sc, 9 inc, 4 sc. [37] Keep your count steady through the run of increases so the eye placement lands where you expect.
Insert safety eyes in Round 9, spaced 5 stitches apart. (Adjust as needed to center eyes on the long side of the nose)
Round 10: 16 sc, 6 inc, 2 sc, 6 inc, 7 sc. [49]
Round 11: 49 sc. [49]
Round 12: 16 sc, 13 dec, 7 sc. [36] This is a good round to slow down and make sure each decrease is clean, especially in plush yarn where stitches can hide.
Round 13: 15 sc, 9 dec, 3 sc. [27]
Round 14: 27 sc. [27]
Round 15: 27 sc. [27]
Round 16: (3 sc, dec) x5, 2 sc. [22]
Round 17: (2 sc, dec) x5, 2 sc. [17] If you haven’t already, this is the point where you want stuffing in before the opening tightens further.
Stuff head firmly, adding extra stuffing to the eyes and cheeks.
Continue directly into Body; do not fasten off
Body (keep going from the head)
You’ll continue in rounds without breaking yarn, building the body and forming the leg gaps as you go. The chain sections matter here, so count them as carefully as you count stitches.
Round 18: (2 sc, inc) x5, 2 sc. [22]
Round 19: (3 sc, inc) x5, 2 sc. [27]
Round 20: (4 sc, inc) x5, 2 sc. [32]
Round 21: ch 5, sk 4, 7 sc, ch 5, sk 4, 17 sc. [34] When you skip, keep the skipped stitches loose enough that you can easily find them later when you come back to work into the gaps.
Round 21 (Front Legs). The skipped stitches create gaps for the legs.
Round 22: 34 sc. [34] Work into the chain spaces as stitches for this round so your stitch count stays on track.
Round 23: 34 sc. [34]
Round 24: 34 sc. [34]
Round 25: 34 sc. [34]
Round 26: 34 sc. [34]
Round 27: 34 sc. [34]
Round 28: 34 sc. [34]
Round 29: (15 sc, dec) x2. [32]
Round 30: 2 sc, ch 5, sk 4, 7 sc, ch 5, sk 4, 15 sc. [34] Take a second to check placement before you commit to the second set of gaps. It’s easier to adjust now than after a few rounds.
Round 30 (Back Legs). Ensure back legs line up with front legs.
Round 31: (15 sc, dec) x2. [32]
Round 32: (4 sc, dec) x5, 2 sc. [27]
Round 33: (3 sc, dec) x5, 2 sc. [22] Stuffing is much simpler before you move on, so do it while the opening still gives you room to position it.
Stuff body at the noted point.
Continue directly into Tail; do not fasten off
Tail (taper and close)
This section continues from the body in rounds and tapers down with decreases. Keep your stuffing tool nearby because you’ll start stuffing partway through and keep going as you close.
Round 34: 22 sc. [22]
Round 35: 22 sc. [22]
Round 36: (9 sc, dec) x2. [20]
Round 37: 20 sc. [20] Don’t wait until the end to add stuffing. It gets fiddly fast once the stitch count drops.
Start stuffing the tail at Round 37 and continue as you finish each round.
Round 38: (8 sc, dec) x2. [18]
Round 39: (7 sc, dec) x2. [16]
Round 40: (6 sc, dec) x2. [14]
Round 41: (5 sc, dec) x2. [12]
Round 42: (4 sc, dec) x2. [10]
Round 43: (3 sc, dec) x2. [8]
Round 44: (2 sc, dec) x2. [6]
Round 45: (1 sc, dec) x2. [4]
Tie off and weave in ends.
Feet and toes (worked into the leg gaps)
You’ll come back to the leg gaps and crochet each foot directly onto the body. Using green yarn, insert hook into one of the leg gaps. Repeat for all 4 legs. If you’re not sure you’re in the right spot, count the skipped stitches from the gap round before you start.
Round 1: 12 sc. [12] Spread those stitches evenly around the opening so you don’t end up with a tight corner on one side.
Round 2: 12 sc. [12]
Round 3: (2 sc, inc) x4. [16]
Round 4: (3 sc, inc) x4. [20]
Round 5: (2 sc, dec) x5. [15]
Round 6: (sc, dec) x5. [10]
Round 7: 5 dec. [5] If your plush yarn makes the last decreases hard to see, use your fingers to feel for the front loops before you pull through.
Fasten off, weave in ends
Toes (white detail work)
This is continuous detail work, not rounds. White plush yarn. You’re basically adding surface loops, so keep your tension consistent and don’t yank the yarn tight.
Insert yarn from Rounds 4–6 of the foot and loop it 3–4 times to create a toe. Make 4 toes per foot. If you want the loops to sit where you place them, bring the yarn up and down through the same entry points each time instead of drifting between stitches.
Tie off and weave in ends.
Spikes (center line, then sides)
This is continuous surface work along the body. Center Spikes: Start at Round 18 on the center of the neck with green yarn. Side Spikes: Start at Round 20, 3 stitches away from the center spikes. Repeat on the other side of the back. It helps to pin or mark the start points so both sides land in the same places, so there’s that.
Repeat (3 dc in 1 st, sl st, sc) 7 times down to the tail. Repeat (3 dc in 1 st, sl st, sc) 4 times down the side. Work these into the stitches of the body fabric, moving one stitch at a time between repeats so you don’t stack them all into the same spot.
Fasten off, weave in ends
Nose and facial details (nostrils, shaping, eye whites)
This is continuous embroidery-style work done with yarn. Take your time here. It’s the kind of step you redo once, then it’s fine.
Nostrils: Using green yarn, insert into Round 2 on the side of the nose, 3 stitches wide. Repeat until desired look is achieved. Leave 3 stitches between nostrils. Face Shaping: Insert green yarn at Round 7 from the bottom of the head to the top between the eyes. Thread over 2 stitches and back to the bottom. Tie ends to pull the face into the desired shape. Eye Whites: Insert white yarn from the back of the head to the top outside corner of the eye. Thread to the bottom outside corner and back to the starting point. Tie and weave in ends. For the shaping, keep the yarn tails long enough to adjust tension before you commit to the final knot.
Fasten off, weave in ends
Final Touches
Insert safety eyes in Round 9, spaced 5 stitches apart. Push the washers on firmly and double-check placement before you lock them in, because you won’t want to remove them from plush fabric. Stuff head firmly, adding extra stuffing to the eyes and cheeks. Use small pieces and pack them where you need them, then smooth with your fingers from the outside. Stuff body at the noted point. Don’t overstuff past the stitch tension you’ve been using, or your decreases can start to gap. Start stuffing the tail at Round 37 and continue as you finish each round. Add a little, crochet a little, then add a little more. Using green yarn, insert hook into one of the leg gaps and crochet the feet; repeat for all 4 legs. If you notice a gap where the foot joins, weave the tail around that join before you cut it. Toes (white plush yarn): Insert yarn from Rounds 4–6 of the foot and loop it 3–4 times to create a toe. Make 4 toes per foot. Tie off on the inside of the foot and weave through a few stitches so the loops don’t loosen. Center spikes: Start at Round 18 on the center of the neck with green yarn and repeat (3 dc in 1 st, sl st, sc) 7 times down to the tail. Side spikes: Start at Round 20, 3 stitches away from the center spikes and repeat (3 dc in 1 st, sl st, sc) 4 times down the side; repeat on the other side of the back. Keep your stitch placement consistent so the repeats don’t drift. Nostrils: Using green yarn, insert into Round 2 on the side of the nose, 3 stitches wide; repeat until desired look is achieved; leave 3 stitches between nostrils. Face shaping: Insert green yarn at Round 7 from the bottom of the head to the top between the eyes; thread over 2 stitches and back to the bottom; tie ends to pull the face into the desired shape. Eye whites: Insert white yarn from the back of the head to the top outside corner of the eye; thread to the bottom outside corner and back to the starting point; tie and weave in ends.
Baby & Child Safety Notes
If this toy is for a baby or young child, skip safety eyes and embroider the eyes instead. Weave in ends with extra passes, then tug-test anything you’ve tied off, including the toe loops and facial details, before it’s handled.
Frequently Asked Questions
Mine comes out about 12 in (30 cm) long from the nose to the tail tip. If your tension runs tight or loose, you might land a little under or over that, so there’s that.
I use 6 super bulky yarn and a 5.00 mm crochet hook for this one. That combo gives me a chunky, sturdy little amigurumi that holds its shape without feeling fussy.
This is Level 2 easy, and I think that’s fair. If you’ve made one small amigurumi before, you’ll be fine.
Changing yarn weight will change the size, yes. I stick with super bulky because I want that 12-inch alligator, and if you go thinner you’ll get a smaller one and a different look.
Tension shows up fast in amigurumi, especially with super bulky yarn. If your stitches are looser, the fabric can look more open and the finished length can creep up a bit, and if you’re tight it can come out shorter.
Final Thoughts
That’s my Alligator Crochet Pattern, and I keep coming back to it when I want an easy amigurumi that still feels like a real project. If you make one, tell me what colors you picked and how long yours ended up from nose to tail tip because I’m nosy like that. Save it to Pinterest if you’re not starting today, because I never remember where I put patterns later, by any means.